Ever noticed how a sunset’s colors blend seamlessly from orange to purple? That’s exactly the magic gradient nails bring to your fingertips. This technique has captivated the nail art world because it offers something rare: sophisticated elegance that’s actually achievable at home.
Gradient nails (sometimes called “ombré nails”) have surged in popularity because they create depth and dimension that solid colors simply can’t match. The subtle transition between colors creates an optical illusion that makes nails appear longer while offering endless creative possibilities. According to beauty industry reports, searches for gradient nail tutorials have increased by 78% since 2023.
Essential gradient tools: What you really need
The beauty of gradient nail art lies in its accessibility—you don’t need professional-grade equipment to create stunning results. Here’s what works best:
- Makeup sponges: The unsung heroes of gradient nails. Their porous texture blends colors perfectly when dabbed onto the nail surface.
- Nail polish thinner: Keeps polishes at the ideal consistency for blending.
- Liquid latex or peel-off base: Creates a barrier around cuticles for easy cleanup.
- Gradient nail brushes: Specialized brushes with tapered bristles for manual blending.
From first-timer to nail artist: Skill progression
Beginners can start with two-color gradients using the sponge technique—the most forgiving method that delivers consistent results. Intermediate artists often experiment with three or more colors and explore vertical or diagonal gradients. Advanced techniques include creating “watercolor” gradients using specialized brushes and thinned polishes for ethereal, translucent effects.
The most successful gradient artists understand that patience is as important as technique. Each layer must dry completely before adding the next—rushing this process is the most common mistake among beginners.
Professional Tools for Creating Nail Gradients That Wow
The art of creating flawless gradients on nails has evolved dramatically, with professional tools now offering precision that was once impossible to achieve. Mastering the perfect ombré effect requires not just skill, but the right equipment in your arsenal.
When exploring tools for creating gradients on nails, what works best often depends on your experience level, budget, and the specific look you’re trying to achieve. The market offers everything from simple sponges to sophisticated airbrush systems, each with distinct advantages for nail professionals and enthusiasts alike.
Gradient Sponges: The Battle of Textures
The humble sponge remains the gateway tool for gradient techniques, but not all sponges perform equally.
Makeup sponges like the Beauty Blender offer accessibility and versatility. Their latex-free polyurethane construction provides a dense, fine-pored surface that creates surprisingly smooth transitions. However, they weren’t designed specifically for nail applications.
Specialized nail sponges, in contrast, feature:
- Finer pore structure optimized for polish application
- Pre-cut shapes that match nail curvature
- Non-absorbent materials that waste less product
| Sponge Type | Cost Range | Durability | Gradient Quality |
|---|---|---|---|
| Makeup Sponges | 2−20 | 5-10 uses | Good |
| Nail-Specific Sponges | 5−15 | 15-20 uses | Excellent |
| Silicone Blenders | 8−25 | 50+ uses | Superior |
The Twinkled T Gradient Sponges have revolutionized the game with their triangular shape that allows for precise application at the cuticle line—a common pain point in gradient creation.
Airbrush Systems: Precision Meets Efficiency
For professionals seeking flawless gradients, airbrush systems represent the gold standard. These tools atomize polish into a fine mist, creating the smoothest possible color transitions.
The efficiency factor cannot be overstated. What takes 15-20 minutes with a sponge can be accomplished in under 5 with a quality airbrush system. The Iwata Eclipse HP-CS offers exceptional control with its 0.35mm needle configuration—ideal for the detailed work nail art demands.
Key considerations when evaluating airbrush systems include:
- Compressor quality: Look for adjustable PSI (10-18 is ideal for nail work)
- Gravity vs. siphon feed: Gravity feed provides better control for detailed gradients
- Maintenance requirements: Systems with easy-clean features save valuable time
The learning curve is steeper than with sponges, but the results speak for themselves.
Gradient Brushes and Applicators: Technique Matters
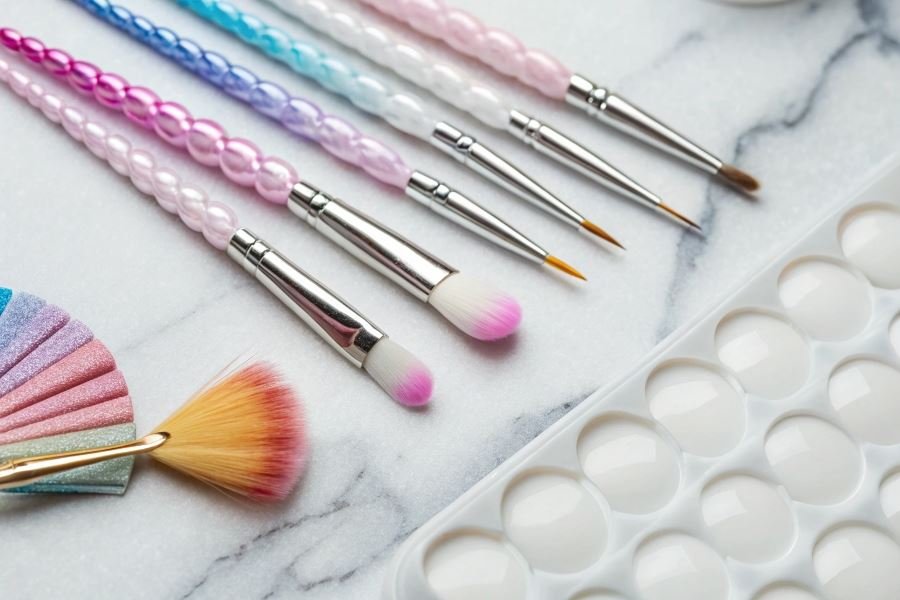
For those who prefer traditional methods, specialized brushes offer unparalleled control. The Alpha Brush Ombré Set features graduated bristle lengths specifically designed to blend colors seamlessly.
Fan brushes deserve special mention for their ability to create:
- Soft, feathered gradients
- Multi-color transitions
- Textured effects impossible with sponges
Silicone applicators have emerged as innovative alternatives, combining the best aspects of brushes and sponges. Their non-porous surface prevents product absorption while their flexible tips allow for precise blending.
Pro tip: Regardless of your tool choice, working quickly before polish begins to dry is essential for seamless gradients. Consider investing in a polish retarder to extend working time.
The gradient tool landscape continues to evolve, with hybrid options like the Artistic Nail Design Ombré Brush combining traditional bristles with specialized applicator tips for versatility that meets professional demands.
Investing in the Right Gradient Nail Tools
When it comes to creating those eye-catching gradient effects on nails, having the right tools isn’t just convenient—it’s essential for achieving professional-looking results. After exploring various application techniques and materials, let’s dive into the practical aspects of selecting gradient tools that deliver the best value, longevity, and match your skill level.
The real cost of gradient perfection
The price range for gradient nail tools spans from budget-friendly to professional-grade investments. Let’s break down what you’re actually getting at different price points:
| Tool Type | Entry-Level Cost | Professional Grade | Value Proposition |
|---|---|---|---|
| Sponge Wedges | $3-8 per pack | $10-15 per pack | Highest cost-efficiency for beginners |
| Gradient Brushes | $8-15 each | $25-40 each | Long-term investment with proper care |
| Airbrush Systems | $80-120 | $200-350+ | Highest initial cost, lowest per-use cost over time |
| Ombré Stampers | $10-15 | $20-30 | Moderate investment with consistent results |
The humble makeup sponge remains the most cost-effective option, with a pack of 50 wedges from Beauty Blender costing around $12 while delivering dozens of gradient applications. Meanwhile, a professional airbrush system from Iwata might set you back $300 but can create thousands of perfect gradients with minimal product waste.
The true value equation isn’t just about upfront costs—it’s about how many successful applications you’ll get before replacement becomes necessary.
Making your gradient tools last
The longevity of your gradient tools directly impacts their real cost and performance over time. Proper maintenance can triple the lifespan of even basic tools:
Silicone gradient tools from brands like Whats Up Nails can last years with proper cleaning after each use. Simply wash with soap and water, then allow to dry completely before storage.
Brushes require more attentive care but reward you with precision that disposable tools can’t match. After each use, clean brushes with acetone for gel polish or appropriate polish remover, then reshape and store upright.
Airbrush systems demand the most maintenance but offer unparalleled longevity. Regular cleaning prevents clogging and ensures consistent performance for 5+ years of professional use.
The most expensive tool isn’t always the best investment—the tool you’ll actually maintain properly is.
Finding your gradient starting point
Selecting the right starter kit depends entirely on your commitment level and existing nail art experience:
For absolute beginners:
Start with a basic gradient kit containing makeup wedges, a cleanup brush, and a top coat like Seche Vite. Total investment: approximately $25.
For intermediate enthusiasts:
Upgrade to a dedicated gradient brush set and silicone tools. The Modu Nail gradient brush set ($35) paired with their silicone ombré tools offers versatility without overwhelming complexity.
For aspiring professionals:
Consider the Gelish ProKit ($120) which includes specialized brushes, silicone tools, and color-theory guides specifically designed for creating salon-quality gradients.
The best starter kit balances immediate usability with room to grow your skills. Avoid all-in-one kits that include low-quality versions of many tools—instead, invest in fewer, better-quality essentials that won’t frustrate you during the learning process.
By carefully considering cost-effectiveness, maintenance requirements, and your skill level, you’ll build a gradient tool collection that delivers consistent results without unnecessary expense or complexity.
Discover the best professional and DIY tools for creating stunning gradient nails in 2025. Compare sponges, airbrush systems, and specialized brushes to achieve salon-quality ombré effects at any skill level.
Discover the best professional and DIY tools for creating stunning gradient nails in 2025. Compare sponges, airbrush systems, and specialized brushes to achieve salon-quality ombré effects at any skill level.