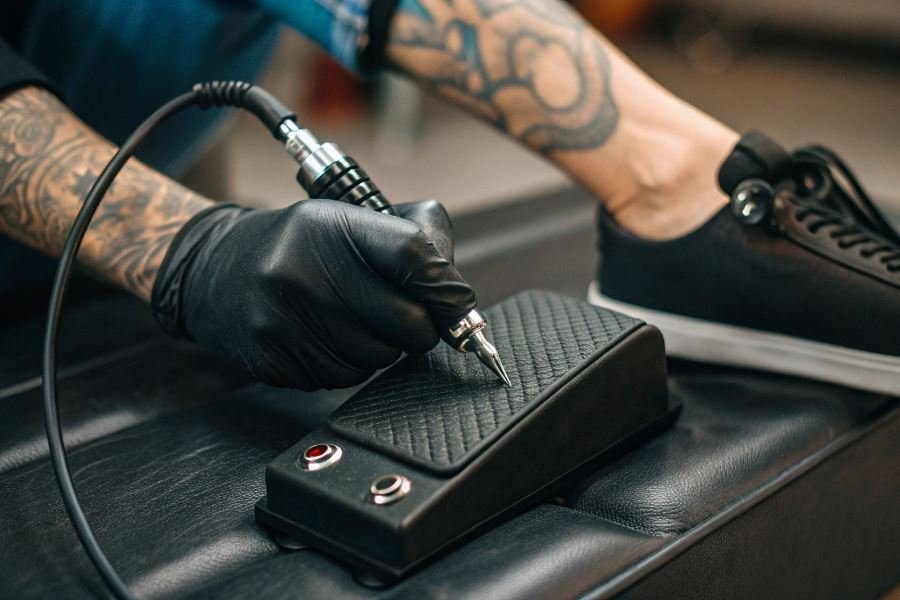
Ever watched a tattoo artist create flawless lines with seemingly effortless control? Behind that precision lies a critical skill many beginners overlook: proper foot pedal sensitivity adjustment. It’s the unsung hero of tattoo artistry—the difference between jagged, uncertain lines and smooth, confident strokes.
Think of your tattoo machine pedal as the accelerator in a high-performance car. Too sensitive, and you’re lurching forward unexpectedly; too stiff, and you’re struggling to maintain consistent power. When adjusted correctly, your pedal becomes an extension of your artistic intent, translating the slightest pressure from your foot into precise needle movement.
The pedal-to-skin connection is where tattoo magic happens. Proper sensitivity settings directly impact:
- Line quality: Consistent power means clean, steady lines without those telltale “jitters”
- Shading gradients: The ability to feather from bold to barely-there requires nuanced pedal control
- Working speed: Comfortable settings reduce fatigue during long sessions
Many newcomers struggle with what veterans call “the pedal dance”—that frustrating experience where the machine either barely runs or suddenly races at full power. This happens because most beginners set their pedals too sensitively, creating an all-or-nothing response that makes subtle work nearly impossible.
“Learning proper pedal control is like learning to whisper and shout with your foot. It takes practice, but once mastered, it becomes second nature.”
The good news? With proper adjustment techniques and consistent practice, this fundamental skill becomes intuitive faster than you might expect.
Mastering Pedal Control: The Art of Sensitivity Adjustment
The difference between amateur and professional tattoo work often comes down to the subtlest details—none more important than how you control your machine. Finding the perfect pedal sensitivity setting transforms hesitant starts and stops into fluid, confident line work. Let’s dive into the techniques that will elevate your tattooing precision.
When I first started exploring the world of tattoo artistry, adjusting the pedal sensitivity for tattoo machines: tips for beginners wasn’t something covered in most basic courses. Yet this fundamental skill dramatically impacts line quality, shading consistency, and ultimately, client comfort. The pedal is your throttle—it deserves the same attention you give to needle selection and ink preparation.
Finding Your Sweet Spot: Sensitivity Calibration
Start with your machine completely powered down. Connect your pedal to your power supply and set the voltage to zero. Now, gradually increase the voltage while applying gentle pressure to your pedal. Notice the exact moment when the machine begins to hum—this is your activation threshold.
For beginners, I recommend a slightly higher activation threshold (requiring more deliberate pressure) to prevent accidental engagement. As your confidence grows, you can lower this threshold for more responsive control.
Key sensitivity settings to experiment with:
- High resistance – Requires firm pressure, excellent for detailed line work
- Medium resistance – Balanced control, ideal for most applications
- Low resistance – Hair-trigger response, perfect for rapid shading techniques
Power Supply Calibration Across Different Systems
Different power supplies offer varying calibration methods, but the principles remain consistent:
| Power Supply Type | Calibration Method | Optimal Starting Point |
|---|---|---|
| Digital LCD | Menu navigation | 60% sensitivity |
| Analog | Physical dial | Mid-range position |
| Foot-based | Tension adjustment | Moderate resistance |
With Critical Power Supply units, access the settings menu and navigate to “Pedal Sensitivity.” Most artists find the 60-75% range provides excellent control while preventing accidental activation.
For analog systems like the classic FK Irons power units, locate the small adjustment screw typically found near the pedal port. A quarter-turn clockwise increases resistance, while counterclockwise decreases it.
Muscle Memory Development Exercises
Developing precise pedal control requires dedicated practice:
-
The Hovering Technique: Set up your machine with ink and practice paper. Aim to maintain the needle just above the surface without making contact—this builds foot sensitivity.
-
Graduated Pressure Drill: Draw five parallel lines, applying progressively more pressure with each line. This teaches you to recognize different power levels through muscle memory.
-
Start-Stop Precision: Practice starting and stopping your machine at precise points along a pre-drawn line. Begin with straight lines, then progress to curves.
The most effective artists dedicate 15 minutes daily to these exercises before working on actual designs.
Remember that temperature affects pedal response—what feels perfect in the morning might feel sluggish by afternoon as your studio warms up. Keep a mental note of your preferred settings under different conditions, and you’ll develop an intuitive feel for adjustments that will become second nature with practice.
Troubleshooting the Pedal Dance: Mastering Sensitivity Control
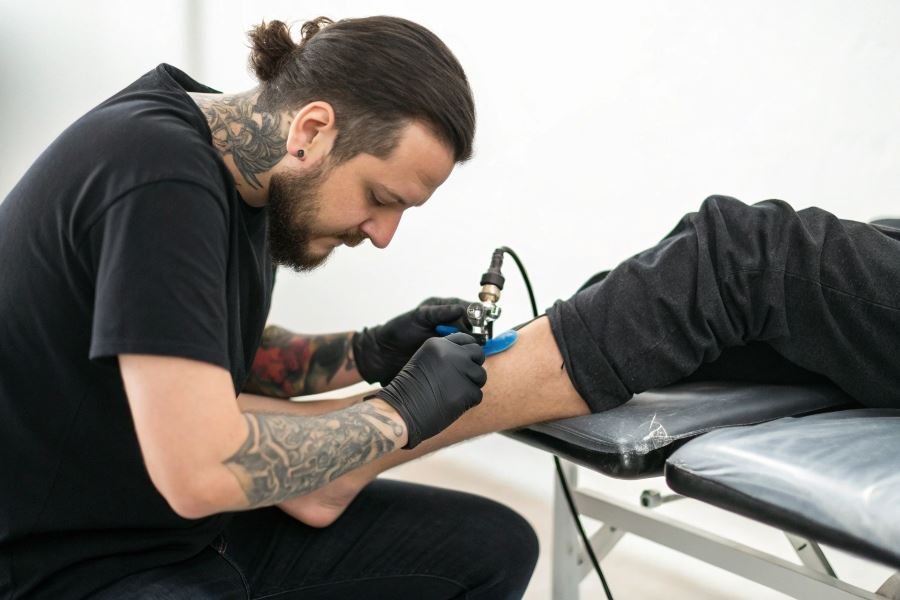
When your tattoo machine isn’t responding the way you need it to, the culprit is often right under your foot. The relationship between artist and foot pedal is intimate—almost like learning to drive a manual transmission car, where finesse matters more than force.
Diagnosing Common Pedal Problems
Most sensitivity issues fall into predictable patterns. If your machine stutters during operation, check for these common culprits:
- Loose connections: The most frequent issue is simply poor contact between pedal and power supply. Ensure all cables are firmly seated.
- Dust and debris: The internal contacts of foot pedals collect microscopic particles that disrupt electrical flow. A quick cleaning with compressed air can work wonders.
- Worn potentiometers: After thousands of hours, the internal components that regulate voltage can degrade. If your pedal suddenly feels “jumpy,” this might be your issue.
The difference between amateur and professional work often isn’t in the hand, but in the foot. Mastering pedal control is mastering the machine.
One overlooked solution is pedal positioning. Your foot’s natural resting angle should align with the pedal’s activation point. Many artists place their pedal too far forward or back, forcing unnatural foot positions during long sessions.
Maintaining Speed Consistency During Marathon Sessions
Foot fatigue is the silent killer of line quality. After several hours, your foot muscles develop micro-tremors that translate directly into inconsistent power delivery.
Try implementing these techniques:
- The heel-toe technique: Rather than keeping your entire foot suspended, anchor your heel and use toe pressure for fine control.
- Scheduled micro-breaks: Every 45 minutes, release the pedal completely for 30 seconds while keeping your foot in position. This prevents muscle memory degradation.
- Pedal height adjustment: Elevating your pedal on a non-slip platform (0.5-1 inch) can dramatically reduce calf strain during 4+ hour sessions.
Muscle memory calibration is essential for consistency. Before beginning each session, spend 2-3 minutes running your machine at various speeds without tattooing. This “warms up” your foot’s proprioception.
Tailoring Sensitivity to Different Tattoo Techniques
Different styles demand different pedal responses. Here’s how to adjust for specific techniques:
| Tattoo Style | Ideal Sensitivity Setting | Pedal Technique |
|---|---|---|
| Fine linework | Low-medium (30-50%) | Light, consistent pressure |
| Shading | Medium-high (50-75%) | Gradual pressure changes |
| Color packing | High (70-90%) | Firm, sustained pressure |
| Dot work | Very low (20-40%) | Tapping rhythm |
For detailed linework, reduce your pedal’s sensitivity by adjusting the throw distance. This creates a longer travel before reaching maximum speed, allowing for more precise control.
When working on bold traditional pieces, increase sensitivity for quick response when you need solid saturation. The FK Irons Spektra Xion and similar machines benefit from higher sensitivity settings when pushing larger needle groupings.
Remember that different machines have different “sweet spots.” A rotary machine typically requires different pedal handling than a coil machine. Document your preferred settings for each machine in your arsenal—this becomes invaluable when switching between setups.
The ultimate goal is developing such intuitive control that your foot becomes an unconscious extension of your artistic intent, leaving your conscious mind free to focus entirely on the art taking shape beneath your hands.
Learn how to adjust tattoo machine pedal sensitivity for better control and precision. Discover step-by-step calibration techniques, troubleshooting tips, and exercises to master foot pedal control for cleaner lines and smoother shading.
Learn how to adjust tattoo machine pedal sensitivity for better control and precision. Discover step-by-step calibration techniques, troubleshooting tips, and exercises to master foot pedal control for cleaner lines and smoother shading.