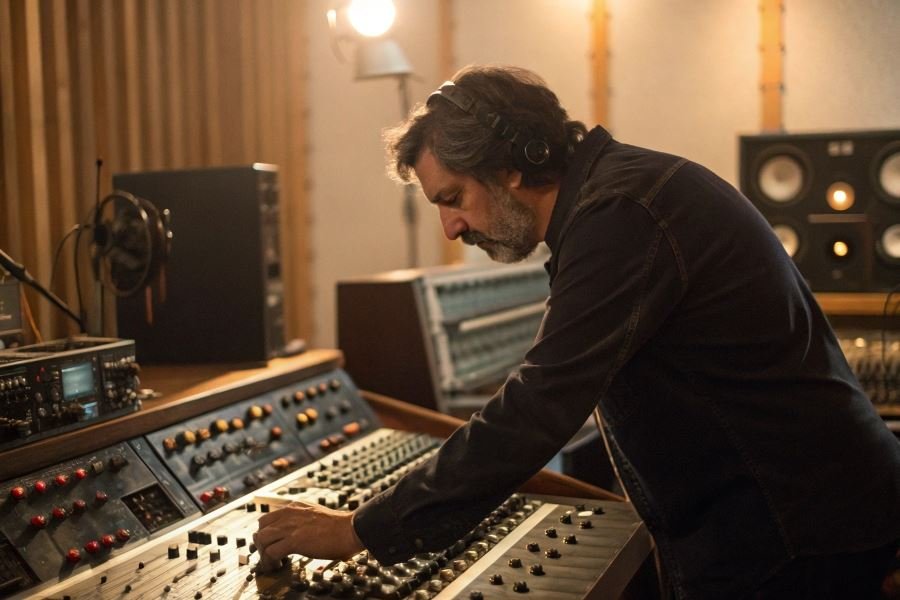
Ever wondered why professional recordings sound so crisp and full while your home setup sounds thin and lifeless? The secret often lies not in expensive microphones, but in what happens to your audio signal immediately after it leaves the mic.
The humble preamp—short for preamplifier—is the unsung hero of exceptional audio. This critical component takes the whisper-quiet signal from your microphone and amplifies it to a usable level without adding unwanted noise or distortion. Think of it as the foundation of your entire recording chain: get this right, and everything that follows benefits tremendously.
The signal chain explained
Your microphone captures sound waves and converts them to electrical signals—but these signals are incredibly weak, often measuring in millivolts. The preamp boosts this fragile signal to line level (typically around 1 volt) where it can be properly processed by other equipment.
Quality matters here: A superior preamp doesn’t just make your signal louder—it preserves the nuances, dynamics, and character of the original performance.
Essential preamp setup toolkit
To achieve that professional sound, you’ll need:
- A quality preamp (standalone unit or audio interface with good preamps)
- Balanced XLR cables
- Proper monitoring system (headphones or speakers)
- Acoustic treatment for your recording space
- A reliable microphone suited to your source
Critical parameters that shape your sound
Three factors dramatically influence your preamp’s performance:
- Gain staging: Setting appropriate input levels prevents distortion while maximizing signal-to-noise ratio
- Impedance matching: Ensuring your preamp and microphone work harmoniously together
- Coloration vs. transparency: Choosing between preamps that add pleasing character or those that faithfully reproduce the source
Master these fundamentals, and you’ll be well on your way to capturing audio that sounds polished and professional.
The Technical Trifecta for Preamp Perfection
Getting your microphone preamp dialed in isn’t just about turning knobs until something sounds decent—it’s about understanding the signal path from source to destination. Setting up a microphone preamp for perfect sound requires attention to detail and knowledge of how each component in your signal chain interacts. When properly configured, a quality preamp transforms a thin, lifeless recording into a professional-grade capture that preserves every nuance of the performance.
Creating the Perfect Connection
The foundation of excellent audio begins with proper connections. Start by selecting the appropriate cable—balanced XLR cables provide the best noise rejection for professional microphones. Ensure all connections are secure and free from oxidation, as even minor connection issues can introduce unwanted noise.
Connection best practices:
- Use high-quality cables with proper shielding
- Verify pin configurations match between equipment
- Keep cable runs as short as practically possible
- Route audio cables away from power cables to prevent interference
For vintage ribbon microphones, be particularly cautious—these delicate instruments require preamps with higher input impedance and often work best with specialized Cloudlifter or similar inline boosters.
Gain Structure and Impedance: The Hidden Heroes
The relationship between your microphone and preamp is intimate and complex. Impedance matching—ensuring your preamp’s input impedance complements your microphone’s output impedance—dramatically affects tone and transient response.
Most modern preamps offer input impedance between 1.5kΩ and 2.5kΩ, which works well with typical dynamic and condenser microphones. However, some boutique preamps like the Rupert Neve Designs models offer variable impedance, allowing you to “tune” the preamp to your specific microphone.
Gain staging requires precision:
- Start with preamp gain at minimum
- Gradually increase until your signal averages around -18dB to -12dB
- Leave adequate headroom (at least 6dB) for unexpected peaks
- Monitor for distortion—unless it’s intentional!
A properly gain-staged preamp provides the optimal signal-to-noise ratio without sacrificing dynamic range.
The Control Trinity: Phantom Power, Filters, and Phase
Modern preamps offer powerful signal conditioning tools that must be configured thoughtfully:
| Control | Function | When to Use |
|---|---|---|
| Phantom Power | Provides +48V to condenser mics | Only with condensers or active DIs |
| High-Pass Filter | Removes low-frequency rumble | For vocals, acoustic instruments |
| Phase Inversion | Flips signal polarity 180° | When using multiple mics on one source |
Phantom power considerations: Always engage phantom power before connecting condenser microphones to prevent voltage spikes. For ribbon microphones, verify they can accept phantom power—many vintage models cannot and may be permanently damaged.
The high-pass filter (sometimes labeled “low cut”) proves invaluable for removing unwanted low-frequency content. Setting this between 80-100Hz for vocals eliminates rumble while preserving the fundamental frequencies. For instruments with significant low-end content like kick drums, you might disable this feature or set it lower (30-40Hz).
Phase controls become critical when using multiple microphones. Incorrect phase relationships create comb filtering that hollows out your sound. When recording drums or any instrument with multiple microphones, use the phase switch while listening to both signals together—the correct setting will produce a fuller, more coherent sound with enhanced low frequencies.
By mastering these technical aspects of preamp setup, you’ll capture audio that requires minimal processing later in your production workflow—the hallmark of professional sound engineering.
Fine-Tuning Your Preamp for Recording Perfection
Tailoring preamp settings across recording scenarios
The magic of a great recording often happens before your signal ever reaches your DAW. When you’re capturing vocals, a Martin acoustic guitar, or the ambience of a cathedral, your preamp settings need to be as different as the sources themselves.
For vocal recordings, start with a gain setting that peaks between -12dB and -6dB on your meters. This provides ample headroom while capturing the nuances of a human voice. The Neve 1073 preamp shines here with its warm mid-range that flatters vocals without additional processing. For particularly dynamic vocalists, consider engaging a gentle 2:1 compression ratio directly on preamps that offer this functionality, like the Universal Audio 6176.
When recording acoustic instruments, your approach should shift significantly:
| Instrument | Ideal Gain Setting | Preamp Recommendation | Special Considerations |
|---|---|---|---|
| Acoustic Guitar | -10dB to -8dB | Grace Design m101 | Transparent, preserves transients |
| Piano | -14dB to -10dB | Rupert Neve Designs 511 | Silk texture adds harmonic richness |
| Brass | -18dB to -14dB | API 512c | Handles transients, maintains punch |
For ambient recording, your preamp becomes even more crucial. Set your gain conservatively around -18dB to -14dB to capture the full dynamic range of environmental sounds. The Sound Devices MixPre-6 II offers exceptional clean gain (up to 76dB) that’s perfect for capturing subtle environmental details without introducing self-noise.
Monitoring techniques that reveal preamp performance
Your monitoring approach determines whether you’ll catch preamp issues before they ruin your recording. Implement a dual monitoring strategy: use high-quality closed-back headphones like the Sennheiser HD 650 for isolation and detail, while maintaining a secondary reference through studio monitors.
Listen specifically for these preamp-related issues:
- Noise floor becoming apparent during quiet passages
- Transient smearing when gain is pushed too hard
- Harmonic distortion that wasn’t intentionally added
- Frequency response anomalies, particularly in the low end
Real-time spectrum analyzers like iZotope Insight 2 can visually confirm what you’re hearing, revealing subtle frequency imbalances that might be introduced by your preamp’s circuitry.
Troubleshooting preamp issues affecting sound quality
When your preamp isn’t delivering pristine audio, systematic troubleshooting will save your session. Start with these common culprits:
Excessive noise often indicates improper gain staging. The solution is straightforward: reduce your preamp gain and increase your monitor level to compensate. If noise persists, check for ground loops by temporarily disconnecting other equipment from your signal chain.
Distortion and clipping typically stem from overdriving your preamp’s input stage. Digital clipping sounds particularly harsh compared to the more musical saturation of analog preamps. Back off your gain by 6dB and re-evaluate.
Thin or weak sound might indicate impedance mismatching. This is especially common with ribbon microphones, which require preamps offering at least 1.5kΩ input impedance. The CloudLifter CL-1 can resolve this by providing additional clean gain and proper impedance matching.
Intermittent signal usually points to connection issues or failing components. Methodically replace each cable in your signal path to isolate the problem before assuming your preamp is at fault.
By mastering these fine-tuning techniques, you’ll extract maximum performance from your preamp investment, ensuring your recordings start with the cleanest, most appropriate signal possible—setting the foundation for truly professional results.
Learn how to set up a microphone preamp for perfect sound with our step-by-step guide. Master gain structure, impedance matching, and configuration techniques for studio-quality recordings across vocals and instruments.
Learn how to set up a microphone preamp for perfect sound with our step-by-step guide. Master gain structure, impedance matching, and configuration techniques for studio-quality recordings across vocals and instruments.