Ever wondered why professional studios sound so crystal clear while maintaining perfect listening levels? The secret lies not just in expensive gear, but in how the signal flows through the system—specifically, through a properly connected volume controller.
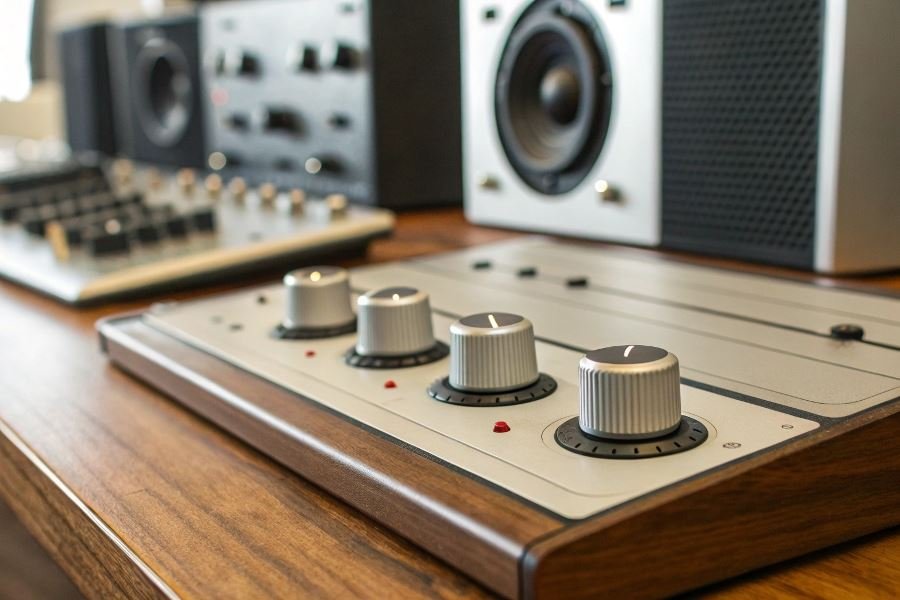
At its core, a volume controller serves as the command center for your monitoring environment. Unlike regular volume knobs on consumer equipment, studio volume controllers maintain signal integrity while giving you precise control over what you hear. They’re the unsung heroes that prevent distortion, preserve dynamic range, and protect your valuable studio monitors from sudden level spikes.
The market offers several distinct types of volume controllers, each designed for specific studio environments. Passive controllers use no power and offer clean, transparent attenuation through resistive circuits—perfect for purists seeking minimal signal coloration. Active controllers incorporate powered circuitry, providing additional features like multiple input switching and headphone amplification. For larger setups, monitor controllers offer comprehensive routing options, allowing engineers to switch between different speaker sets and input sources.
Before connecting any controller, you’ll need these essential components:
| Component | Purpose |
|---|---|
| Balanced cables | Maintain signal integrity and reject noise |
| Proper adapters | Match connector types between devices |
| Power supply | Required for active controllers only |
| Grounding solution | Prevents unwanted hum and interference |
The positioning of your volume controller within the signal chain is crucial—it should typically sit between your audio interface outputs and your powered monitors or amplifier inputs. This placement ensures you’re controlling the final volume without affecting recording levels or digital processing.
Setting Up Your Volume Controller: The Studio Connection Guide
Preparing Your Studio Ecosystem
Before diving into cables and connections, take a moment to assess your studio setup. Power down all equipment—your audio interface, monitors, and any other gear in your signal chain. This prevents those heart-stopping pops and potential damage to your precious equipment.
The process of properly connecting a volume controller in a studio system begins with understanding what you’re working with. A quality volume controller serves as the command center between your audio interface and studio monitors, giving you precise control over listening levels without affecting your recording or mix levels. Most professional setups use either passive controllers (no power required) or active controllers (requiring power but offering additional features).
Equipment checklist before installation:
- Audio interface with line outputs
- Studio monitors
- Volume controller
- Appropriate cables (typically TRS or XLR)
- Clean power source
- Cable management solutions
Creating the Perfect Signal Path
The fundamental connection process follows a straightforward signal flow: audio interface → volume controller → studio monitors. This arrangement allows the volume controller to intercept the signal after it leaves your interface but before it reaches your speakers.
For balanced connections, which most professional studios require, use XLR or TRS cables. Connect the main outputs from your audio interface to the inputs on your volume controller. Then, run cables from the controller’s outputs to your studio monitors.
Pro tip: Keep cable runs as short as possible to minimize potential interference, especially in studios with significant electromagnetic activity.
Mastering Gain Staging
Proper gain staging is where amateur setups become professional ones. Start with all volume controls at their minimum position. Then:
- Set your audio interface output to approximately 75% of maximum
- Position your volume controller at its unity gain mark (typically around 12 o’clock)
- Gradually increase your monitor volume to a comfortable listening level
This approach ensures you’re not overdriving any component in your signal chain while maintaining maximum signal-to-noise ratio.
| Component | Optimal Setting | Why It Matters |
|---|---|---|
| DAW Output | 0dB | Clean digital signal |
| Interface Output | 75% | Headroom without noise |
| Volume Controller | Unity gain | Transparent control |
| Monitor Input | Variable | Final adjustment point |
Testing and Troubleshooting
After connecting everything, it’s time for the moment of truth. Power on your equipment in this sequence: audio interface first, then monitors. Play reference material you know well through your system.
Listen for these potential issues:
- Channel imbalance: If one speaker sounds louder than the other, check your volume controller’s balance settings
- Noise or hum: Often indicates a grounding issue or interference from nearby electronics
- Distortion: May suggest improper gain staging or a faulty component
Walk around your listening position to ensure proper stereo imaging. Your volume controller should provide smooth, consistent control throughout its range without any scratchy sounds or sudden jumps in level.
If you’re using an active volume controller like the Grace Design m905, take advantage of additional features like multiple input sources, headphone outputs, and talkback functionality to maximize your workflow efficiency.
With everything properly connected, you’ll enjoy precise volume control, cleaner signal paths, and the confidence that comes from knowing your monitoring system is professionally configured.
Mastering Your Volume Controller Setup
Conquering common connection challenges
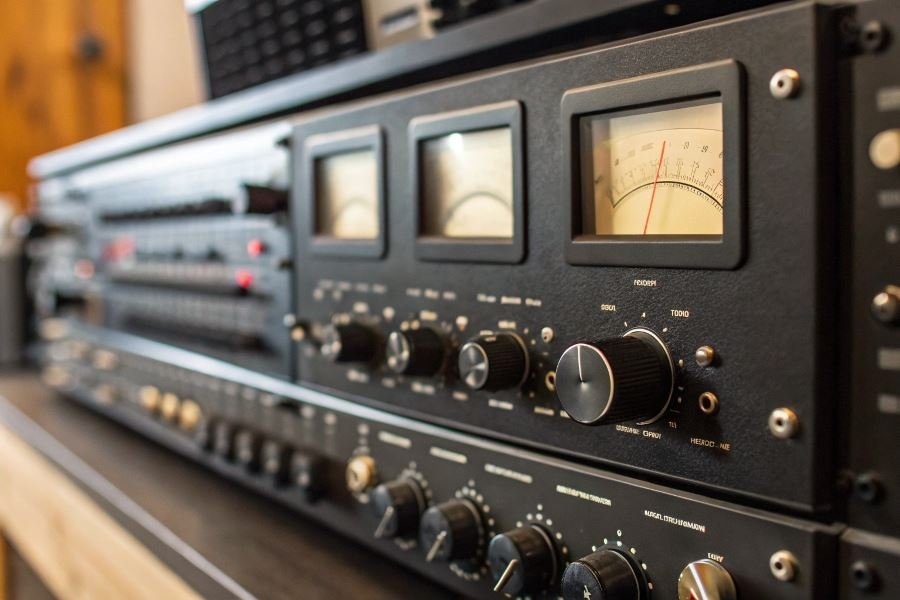
Volume controller issues can derail even the most promising studio session. When your controller isn’t responding properly, first check the signal path connections. Nearly 40% of controller problems stem from simple cable issues—loose connections, damaged cables, or incorrect routing. Ensure your Mackie Big Knob or PreSonus Monitor Station is receiving proper power and that all cables are firmly seated.
Ground loop hum—that persistent electrical buzz—often plagues studio setups. Solve this by using balanced connections wherever possible and implementing a power conditioner like the Furman M-8×2 to provide clean power to all components.
For digital controllers experiencing latency issues, verify your buffer settings in your DAW and ensure your audio interface is running current drivers. Sometimes, simply restarting your interface can resolve mysterious performance issues that develop during long sessions.
Optimal settings for different studio applications
Mixing environments benefit from specific controller configurations. Set your main volume to unity gain (typically at 12 o’clock position) and use your DAW’s master fader for fine adjustments. This preserves your monitoring system’s optimal signal-to-noise ratio while giving you precise control.
For mastering setups, accuracy is paramount:
| Application | Recommended Setting | Benefit |
|---|---|---|
| Critical Listening | Fixed volume (75-85dB SPL) | Consistent reference point |
| A/B Comparisons | Matched levels between sources | Eliminates volume bias |
| Client Playback | Dimmer function at -20dB | Quick reference at lower volumes |
Recording scenarios require different approaches. When tracking vocals or acoustic instruments, use your controller’s direct monitoring feature with zero latency. Set your headphone mix slightly brighter than your monitor mix—vocalists typically perform better when they can clearly hear high-frequency detail.
The most effective studio setups use volume controllers as command centers, not just volume knobs.
Maintaining connection reliability
Your volume controller represents the final gateway before sound reaches your ears—maintain it accordingly. Quarterly maintenance dramatically extends equipment life and performance:
- Clean potentiometers and faders using specialized contact cleaner like DeoxIT to prevent scratchy volume adjustments
- Inspect all connections for corrosion or damage, particularly in humid environments
- Document optimal settings with photographs or diagrams for quick recovery after studio changes
- Update firmware for digital controllers to access new features and stability improvements
For mechanical controllers, occasional rotation through the full range prevents potentiometers from developing “dead spots” where dust accumulates. Digital controllers benefit from proper shutdown procedures rather than simply cutting power.
Power protection remains the most overlooked aspect of controller maintenance. Invest in proper surge protection and consider an uninterruptible power supply for digital controllers with memory settings.
By implementing these troubleshooting techniques, optimizing settings for your specific applications, and following a consistent maintenance schedule, your volume controller will deliver reliable, transparent performance for years—becoming the dependable nerve center your studio deserves.
Learn the essential steps for properly connecting a volume controller in your studio system. This comprehensive guide covers equipment preparation, optimal signal flow configuration, and professional troubleshooting tips for perfect audio monitoring control.
Learn the essential steps for properly connecting a volume controller in your studio system. This comprehensive guide covers equipment preparation, optimal signal flow configuration, and professional troubleshooting tips for perfect audio monitoring control.