
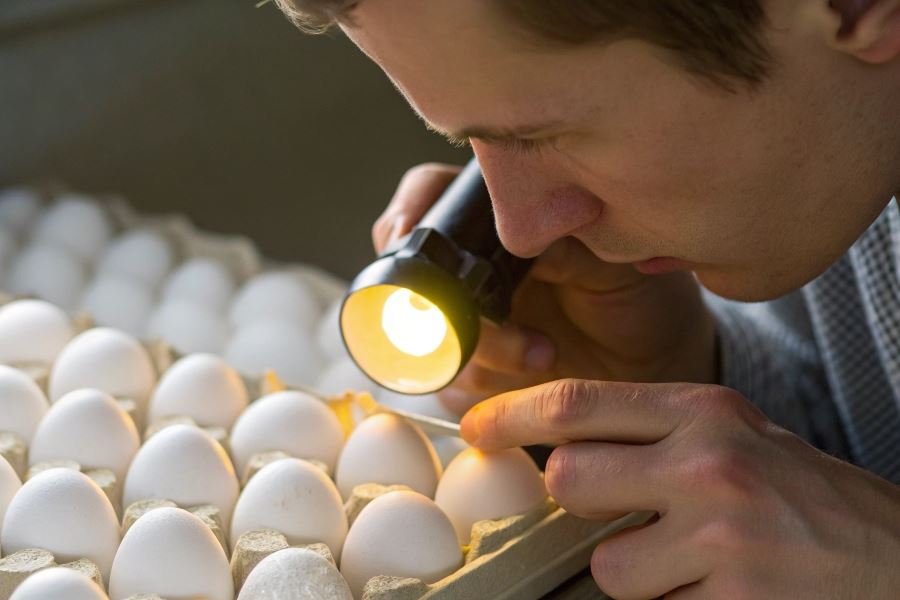
Ever cracked open an egg only to discover it wasn’t quite what you expected? That moment of culinary disappointment could have been avoided with one simple tool: an ovoscope. This specialized device isn’t just for commercial producers—it’s becoming the secret weapon of discerning home cooks and small-scale egg enthusiasts across America.
An ovoscope (or egg candler) is essentially a light source designed to illuminate an egg’s interior without breaking the shell. By placing an egg over this concentrated light, you can see through the semi-translucent shell to evaluate freshness, detect hairline cracks, identify blood spots, and even determine fertility in hatching eggs.
The practice dates back centuries, with farmers in ancient China using oil lamps to “candle” eggs as early as 300 BCE. The term “candling” itself comes from the original method—holding eggs up to a candle flame in a darkened room. Today’s technology has transformed this ancient technique into a precise science, with LED ovoscopes providing superior illumination without heat damage.
Why invest in an ovoscope? Beyond avoiding breakfast surprises, these devices offer remarkable insights into egg quality. A properly candled egg reveals its air cell size (smaller indicates fresher eggs), yolk position (centered in fresh eggs, floating in older ones), and internal defects invisible from the outside. For those incubating eggs, an ovoscope becomes indispensable for monitoring embryo development and viability throughout incubation.
The difference between guessing and knowing what’s inside your eggs isn’t just about avoiding waste—it’s about elevating your standards for what reaches your table.
Mastering the Art of Egg Candling with an Ovoscope
The humble egg—nature’s perfect package—holds secrets that only become visible when light penetrates its shell. Professional egg producers and backyard chicken enthusiasts alike rely on a specialized tool called an ovoscope to reveal what’s happening inside those calcium carbonate fortresses. Learning how to properly use an ovoscope to check eggs transforms a guessing game into a science, allowing you to identify freshness, fertility, and potential problems with remarkable precision.
Creating the Optimal Examination Environment
The first rule of effective egg candling is darkness—complete, enveloping darkness. An ovoscope works by directing focused light through the egg, making the interior contents visible as silhouettes against the illuminated shell. Even minimal ambient light will compromise your ability to see clearly.
Location matters tremendously. Choose a windowless room or work after sunset. Many professionals dedicate a small closet or cabinet specifically for egg examination. If a dedicated space isn’t possible, drape a heavy blanket over yourself and the ovoscope to create a portable darkroom.
Modern LED ovoscopes like the GQF Manufacturing Ovascope provide sufficient illumination without generating excess heat that could damage eggs. Position your device on a stable, flat surface at a comfortable working height to prevent fatigue during extended examination sessions.
Proper Egg Handling Techniques
Handling technique dramatically affects both accuracy and egg safety. Always wash and dry your hands before beginning, as oils from your skin can clog the egg’s pores and potentially introduce bacteria.
Hold each egg by its sides between your thumb and first two fingers, using a gentle but secure grip. Position the larger end (where the air cell resides) upward against the light source. This orientation provides the clearest view of internal structures.
Rotation is key to comprehensive examination. Slowly turn the egg while maintaining contact with the light source, observing how internal contents shift. A complete 360° rotation allows you to examine the entire interior.
Interpreting What You See
The true skill in ovoscope use lies in accurate interpretation. When light penetrates a fresh, unfertilized egg, you’ll observe:
- Air cell assessment: Located at the larger end, this pocket should be small in fresh eggs (approximately 1/8 inch deep) and increases in size as the egg ages.
- Yolk position: In fresh eggs, the yolk appears centered and moves slowly when rotated. As eggs age, yolk membranes weaken, causing faster movement.
- Blood or meat spots: These appear as dark, stationary spots and indicate minor defects that, while harmless, affect quality grading.
| Age of Egg | Air Cell Size | Yolk Movement | Shell Transparency |
|---|---|---|---|
| 1-3 days | Minimal | Barely visible, stable | Highly opaque |
| 1-2 weeks | Medium | Visible, moves slowly | Moderately transparent |
| 3+ weeks | Large | Moves freely, may break | Very transparent |
For fertile eggs, development stages become visible after 4-7 days of incubation. Look for a distinctive network of blood vessels radiating from a central embryonic disk. By day 10, you’ll observe movement if the embryo is developing properly.
Troubleshooting tip: If you’re struggling to see clearly, try adjusting the angle of the egg against the light source. Sometimes a slight tilt provides better visibility of internal structures.
With practice, your ability to detect subtle variations will improve dramatically, making the ovoscope an invaluable tool for quality control, incubation monitoring, or simply satisfying curiosity about this remarkable natural package.
Advanced Ovoscope Techniques That Pros Don’t Share
Mastering the art of egg candling with an ovoscope opens up a world of possibilities beyond basic quality checks. Whether you’re a small-scale poultry farmer monitoring hatching progress or a discerning home cook verifying the freshness of your breakfast ingredients, advanced ovoscope techniques can dramatically improve your results.
Tracking embryo development with precision
When examining fertilized eggs, the ovoscope transforms from a simple tool into a window to new life. During the first 48 hours of incubation, look for the telltale spider-like formation of blood vessels radiating from a central point—this indicates successful fertilization and early development.
By day 5, a properly developing embryo will appear as a dark spot with visible blood vessels branching outward. The air cell (visible as a clear space at the wider end) should gradually increase in size as incubation progresses.
Pro tip: Rotate the egg slowly while examining to get a complete view of development. Uneven or stalled growth patterns often indicate problems with viability.
For optimal results, maintain a consistent candling schedule:
- First check: Day 4-7 of incubation
- Second check: Day 14
- Final check: Day 18 (for chicken eggs)
Remember that excessive handling or prolonged exposure to the ovoscope’s light can harm developing embryos. Limit each examination to under 30 seconds per egg.
Quality assessment of store-bought eggs
Store-bought eggs present different challenges when examined under an ovoscope. Unlike fertilized eggs, you’re looking for signs of freshness and quality rather than development.
A truly fresh egg displays minimal internal movement when rotated and has a nearly invisible air cell. As eggs age, the air cell expands noticeably—a valuable indicator of freshness that packaging dates don’t always accurately reflect.
| Air Cell Size | Approximate Age | Quality Rating |
|---|---|---|
| < 1/8 inch | Very fresh | AA Grade |
| 1/8 – 3/16 inch | 1-2 weeks old | A Grade |
| 3/16 inch | 3+ weeks old | B Grade |
When examining store-bought eggs, pay special attention to:
- Yolk position: In fresh eggs, the yolk remains centered when rotated
- Albumen clarity: Fresh eggs show clear distinction between thick and thin albumen
- Internal spots: Dark spots may indicate blood spots or contamination
Quality indicator: The less the yolk moves when you rotate the egg, the fresher it is. Excessive movement suggests breakdown of the chalazae (protein strands that anchor the yolk).
Troubleshooting common ovoscope challenges
Even experienced users encounter difficulties when using ovoscopes. Dark-shelled eggs (like those from Marans hens) require stronger illumination—consider upgrading to an LED ovoscope with adjustable brightness for these varieties.
When examining duck or goose eggs, their naturally thicker shells and larger size demand modified techniques:
- Increase light intensity
- Extend viewing time slightly (up to 45 seconds)
- Use a larger ovoscope opening if available
Struggling with visibility? Try candling in a completely darkened room. The contrast improvement is remarkable, revealing details invisible under normal lighting conditions.
If you notice hairline cracks that weren’t visible to the naked eye, mark these eggs for immediate use—they’re safe to eat but won’t store well and shouldn’t be incubated.
By mastering these advanced techniques, you’ll extract maximum value from your ovoscope investment while ensuring only the highest quality eggs make it to your breakfast table or incubator.
Learn how to properly use an ovoscope to check eggs for freshness, fertility, and quality. Our comprehensive guide covers setup techniques, interpretation methods, and advanced egg candling skills for both beginners and experienced users.
Learn how to properly use an ovoscope to check eggs for freshness, fertility, and quality. Our comprehensive guide covers setup techniques, interpretation methods, and advanced egg candling skills for both beginners and experienced users.

