Ever wondered why some nail designs look flawless while others fall flat? The secret lies not in the hand, but in what the hand holds.
The difference between amateur nail art and professional masterpieces often comes down to one critical factor: proper tool selection. Just as a master carpenter selects specific chisels for detailed woodwork, nail artists must choose instruments precisely matched to their techniques. The right tools don’t just make the job easier—they transform possibilities.
The foundation of your nail arsenal
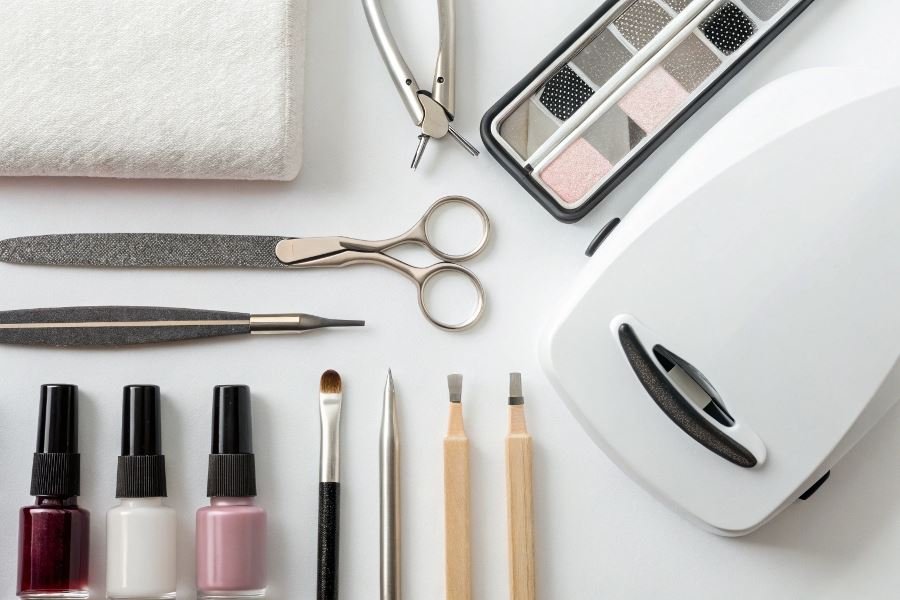
At its core, professional nail design relies on several distinct tool categories, each serving specific functions in your creative process:
- Base tools: Files, buffers, cuticle pushers, and nippers that prepare the canvas
- Application instruments: Brushes of varying sizes, dotting tools, and specialized applicators
- Enhancement equipment: UV/LED lamps, electric files, and extension systems
- Artistic implements: Stamping plates, foil applicators, and gradient sponges
“Quality tools don’t just perform better—they teach better techniques through their responsiveness.”
The selection trinity: quality, technique, and skill
When building your nail design toolkit, three factors should guide every purchase:
-
Quality markers: Look for tools with balanced weight, ergonomic design, and materials that resist corrosion and wear. Premium brushes maintain their shape after cleaning, while superior metal implements hold their edge.
-
Technique requirements: Each nail art method demands specific tools—3D art requires acrylic sculpting brushes, while watercolor effects need fine-tipped detail brushes and absorbent surfaces.
-
Skill alignment: As your expertise grows, so should your tool sophistication. Beginners benefit from forgiving, multi-purpose tools, while advanced artists can leverage specialized instruments that require precise handling.
Remember that investing in professional-grade tools early often accelerates your learning curve and produces superior results from the start.
Precision Tools for Perfect Nail Techniques
The difference between amateur nail work and professional-grade artistry often comes down to the tools in your arsenal. Selecting the right implements for specific nail techniques isn’t just about having options—it’s about achieving precision, efficiency, and stunning results that last. When professionals approach how to choose tools for nail design for specific techniques, they consider durability, ergonomics, and technique-specific requirements that elevate their craft.
Essential Tools for Gel Nail Application
Gel application demands precision and the right curing technology. The foundation of any gel system starts with a high-quality LED lamp that provides consistent curing power—typically 36-48 watts for optimal results. Look for models with timers and automatic sensors to streamline your workflow.
For application, invest in:
- Gel brushes with synthetic bristles (sizes #4 and #6) that won’t absorb product
- Thin spatulas for precise gel placement
- Rubber-tipped tools for cuticle manipulation without scratching the nail bed
The difference between mediocre and magnificent gel application often lies in your prep tools. A 180/240 grit buffer creates the perfect surface texture for adhesion without excessive damage to the natural nail.
| Tool Type | Purpose | Key Features to Look For |
|---|---|---|
| Gel Brush | Application | Synthetic bristles, ergonomic handle |
| Buffer | Surface prep | 180/240 grit, washable surface |
| LED Lamp | Curing | 36-48W, timer settings, even light distribution |
| Gel Cleanser | Removing tacky layer | Alcohol-based, lint-free applicators |
Specialized Tools for Nail Art and Decorative Techniques
Nail art requires tools that offer both precision and versatility. The cornerstone of any nail artist’s collection should include:
Dotting tools with various tip sizes (0.5mm to 2mm) allow for everything from intricate patterns to perfect French tips. Look for stainless steel construction with comfortable grips that prevent hand fatigue during detailed work.
Fine-line brushes transform ordinary manicures into miniature masterpieces. When selecting brushes for nail art:
- Choose kolinsky or synthetic-kolinsky blend brushes for detailed work
- Ensure brushes maintain a sharp point when wet
- Select handles that offer balance and control
For embellishment application, reverse tweezers with precision tips make placing stones, studs, and foils remarkably easier. The self-closing mechanism keeps your hands relaxed while positioning decorative elements with pinpoint accuracy.
Tools Required for Acrylic Nail Application
Acrylic application demands specialized tools that can handle the unique properties of powder and liquid systems. The cornerstone of acrylic application is the brush—typically a size #8 or #10 with natural kolinsky sable bristles that form a perfect bead when dipped in monomer.
Dappen dishes made of glass provide the ideal surface for holding monomer, as plastic can react with the chemicals. Look for dishes with secure lids to prevent evaporation and contamination.
Acrylic nippers with spring-loaded handles reduce hand strain during lengthy application sessions. The cutting edge should be sharp enough to cleanly trim excess product without causing stress cracks.
For finishing, invest in:
- E-files with variable speed control (15,000-30,000 RPM)
- Carbide bits for efficient shaping without heat buildup
- 100/180 grit files for refining the free edge
The quality of your acrylic tools directly impacts application time, client comfort, and the longevity of the enhancement. Premium tools might require a larger initial investment but deliver superior results and typically last significantly longer than budget alternatives.
Building Your Professional Nail Design Arsenal
The Essential Starter Kit for Beginners
Starting your nail design journey doesn’t require emptying your bank account. A thoughtfully curated beginner’s kit provides everything needed to master fundamental techniques while developing your skills. Begin with high-quality basics: a durable OPI Base Coat and top coat, 5-10 versatile gel polish colors, and an LED lamp with at least 36 watts of power. Add precision tools including a straight-edge cuticle pusher, fine-tip nail art brushes (sizes 00, 0, and 1), and a dotting tool set with varied tip sizes.
Don’t skimp on these essentials: A 180/240 grit buffer, lint-free wipes, and isopropyl alcohol (91% concentration) for proper preparation and cleanup. Many beginners make the mistake of purchasing low-quality brushes that shed bristles or cheap lamps that cure unevenly—these false economies ultimately cost more in wasted product and redone designs.
The difference between professional results and amateur attempts often comes down to having the right foundation tools, not necessarily the most expensive ones.
Smart Investment Strategies for Professional Tools
As your skills advance, strategic upgrades can dramatically improve your efficiency and design capabilities. Professional-grade tools represent a significant investment but deliver superior performance and longevity.
| Tool Category | Entry Level Cost | Professional Grade Cost | Lifespan Difference |
|---|---|---|---|
| E-file | $40-80 | $200-350 | 2-3x longer |
| LED/UV Lamp | $30-60 | $150-300 | 3-4x longer |
| Gel Brushes | $5-15 each | $25-45 each | 5x longer with care |
| Nail Drill Bits | $15-30 set | $20-40 each | 10x longer |
When upgrading, prioritize tools that directly impact technique execution. A professional Medicool Pro Power 35K e-file offers precise RPM control and reduced hand fatigue during extensive sculpting sessions. Similarly, investing in Japanese-made cuticle nippers ($80-120) provides cleaner cuts with less client discomfort than their $15 counterparts.
The professional difference: Higher-grade tools often feature ergonomic designs that prevent repetitive strain injuries—a crucial consideration for full-time nail technicians performing 5-8 services daily.
Extending Tool Lifespan Through Proper Maintenance
The most sophisticated tools become worthless without proper maintenance. Implement these care protocols to maximize your investment:
-
Clean after every use: Remove product residue from brushes with the appropriate solvent (acetone for acrylic brushes, brush cleaner for gel brushes). Never soak natural hair brushes.
-
Sanitize properly: Use hospital-grade disinfectants like Barbicide for metal implements, following manufacturer-recommended contact times (typically 10 minutes).
-
Sharpen regularly: Maintain the edge on nippers and cuticle scissors with professional sharpening every 3-4 months of regular use.
The most expensive tool in your kit is the one you have to replace prematurely due to improper maintenance.
For e-files, clean and lubricate the handpiece weekly, and inspect cords for wear. Store bits upright in dedicated holders to prevent dulling. LED lamps require periodic bulb inspection and replacement according to manufacturer specifications—typically after 50,000 hours of use.
By thoughtfully building your collection from reliable beginner tools to strategic professional upgrades, and implementing consistent maintenance protocols, you’ll develop a nail design arsenal that delivers exceptional results for years to come.
Discover the essential tools for mastering specific nail design techniques from gel application to intricate nail art. Learn how to select quality implements based on your skill level and preferred techniques for professional-quality results.
Discover the essential tools for mastering specific nail design techniques from gel application to intricate nail art. Learn how to select quality implements based on your skill level and preferred techniques for professional-quality results.