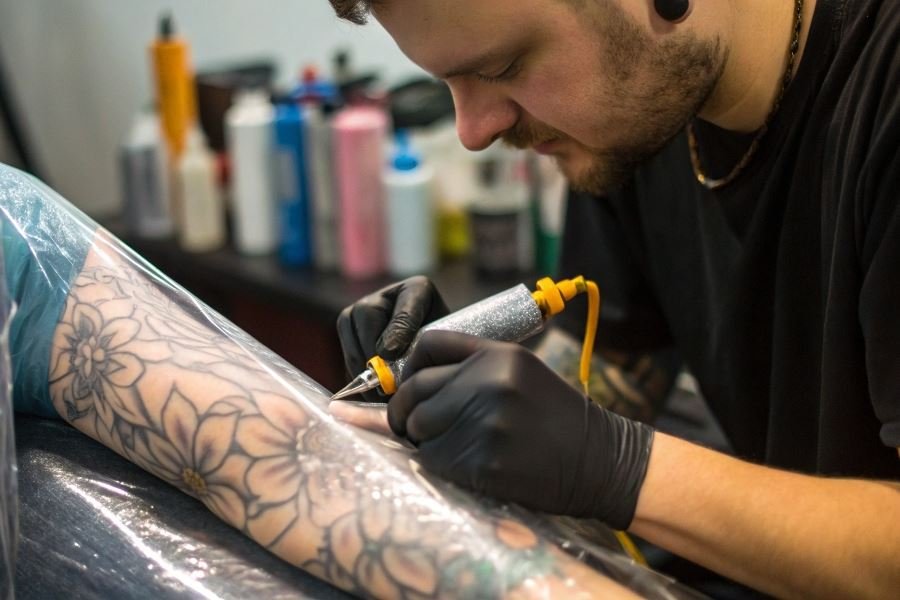
Ever watched a fresh tattoo transform from raw art to healed masterpiece? The secret weapon in this metamorphosis isn’t just the artist’s skill—it’s the nearly invisible layer protecting that new ink during its most vulnerable days. Occlusive protective films have revolutionized tattoo aftercare, yet many beginners overlook their critical importance.
When clients leave your chair, their satisfaction hinges on more than just your line work. The healing process determines whether your art maintains its vibrancy or fades into a disappointing shadow of your original vision. Selecting the right occlusive film isn’t just a minor detail—it’s the difference between a walking advertisement for your skills and a regretful client.
The healing science behind the film
Occlusive films create a controlled microenvironment that accelerates healing while protecting against contaminants. Unlike traditional methods that expose fresh tattoos to air, modern films maintain optimal moisture levels that can reduce healing time by up to 50%. This “second skin” approach allows clients to resume normal activities almost immediately—a benefit they’ll absolutely rave about.
What makes a quality film worth investing in?
- Breathability: Allows oxygen exchange while blocking bacteria
- Adhesion duration: Ideally 3-5 days without premature peeling
- Transparency: Enables easy monitoring of the healing process
- Flexibility: Conforms to body contours without restricting movement
For beginners, the temptation to cut corners on supplies is strong, but remember: your aftercare recommendations directly impact client retention. Premium films typically cost $1-3 per application—a small investment considering the potential word-of-mouth marketing from a perfectly healed tattoo.
Choose wisely. Your reputation is sealed beneath every film you apply.
Top 3 Occlusive Films That Will Transform Your Tattoo Aftercare Game
When you’re just starting your journey as a tattoo artist, selecting the right aftercare products can feel overwhelming. The occlusive protective film you recommend to clients can make or break their healing experience—and ultimately, your reputation. Let’s dive into the three most effective options that balance protection, healing properties, and client comfort.
For beginners wondering which occlusive protective film should a beginner tattoo artist choose, the answer isn’t one-size-fits-all. Your selection should consider factors like tattoo size, placement, client lifestyle, and skin sensitivity. The good news? The market has evolved dramatically since the days of plastic wrap and petroleum jelly.
Medical-Grade Polyurethane Films: The Gold Standard
Medical-grade polyurethane films like Saniderm and Dermalize Pro have revolutionized tattoo aftercare. These transparent, adhesive membranes create the optimal healing environment while providing exceptional protection.
Key Benefits:
- Creates a waterproof, bacteria-proof barrier
- Allows skin to breathe while retaining natural moisture
- Reduces scabbing and color loss
- Protects against clothing friction and environmental contaminants
Application Technique:
- Apply to thoroughly cleaned, dry skin
- Leave at least 1-inch border around the tattoo
- Smooth from center outward to prevent air bubbles
- First film should be removed after 24 hours, second application can remain 3-5 days
Cost Analysis:
| Product | Size | Price Range | Cost Per Client |
|---|---|---|---|
| Saniderm | 8″ × 10″ | $18-25 | $3-5 |
| Dermalize Pro | 6″ × 8″ | $15-20 | $2.50-4 |
| TattooMed | 10″ × 10″ | $20-28 | $3-6 |
While the initial investment might seem higher than traditional aftercare, the reduced risk of complications and superior results make polyurethane films cost-effective in the long run.
Second-Skin Hydrocolloid Bandages: Comfort Meets Protection
Hydrocolloid dressings like Tegaderm and DuoDERM offer a unique healing advantage through their moisture-absorbing properties.
Breathability & Durability:
- Absorbs excess fluid while maintaining optimal moisture level
- Creates a gel-like cushion that protects the tattoo
- Typically lasts 3-7 days without replacement
- Slightly thicker than polyurethane, offering enhanced protection
The comfort factor with hydrocolloids is exceptional—clients often report forgetting they’re even wearing a bandage. This makes them particularly valuable for tattoos in high-friction areas like inner arms or thighs.
Transparent Adhesive Dressings: Flexibility For Every Situation
Traditional transparent adhesive dressings like Opsite and Tegaderm offer reliable protection with maximum flexibility.
Water Resistance & Flexibility:
- Conforms to complex body contours
- Maintains seal during showering
- Thinner profile works well under clothing
- Available in various sizes for any tattoo dimension
Removal Process:
- Start at one edge and pull parallel to skin (never upward)
- Use warm water or oil to loosen adhesive if necessary
- Remove slowly to prevent disrupting healing tissue
- Clean area gently after removal
These dressings typically cost $1-3 per application, making them the most budget-friendly option for beginners building their supplies.
The right occlusive film can dramatically improve healing outcomes, reduce complications, and enhance client satisfaction. By mastering these three options, you’ll be equipped to provide personalized aftercare recommendations that protect both the art you create and the skin it adorns.
Making the Final Decision: Your Perfect Occlusive Film Match
Matching Film Properties to Tattoo Styles and Placement
The relationship between tattoo style and protective film is more crucial than many beginners realize. Different tattoo techniques create different healing environments that benefit from specific film properties.
For fine line work and minimalist designs, thinner films (2-3 mil thickness) provide adequate protection without excessive moisture buildup. These delicate pieces typically produce less exudate and benefit from films like Saniderm that offer a lower profile while maintaining barrier protection.
Traditional American and bold color work often requires more robust options. These tattoos typically weep more during healing and benefit from films with higher absorption capacity like Recovery Derm Shield, which can handle increased fluid without compromising adhesion.
Placement areas dramatically influence film selection:
| Body Area | Recommended Film Properties | Challenge Factor |
|---|---|---|
| Joints/Flexion Points | High elasticity, reinforced edges | High |
| Flat Surfaces (Back, Chest) | Standard adhesion, larger sheets | Low |
| Curved Areas (Calves, Biceps) | Medium elasticity, conformable | Medium |
| High Friction Zones | Extra-strong adhesion, water-resistant | Very High |
Tattoos in high-movement areas need films that can flex repeatedly without edge lifting or center bubbling.
Budget Considerations and Bulk Purchasing
Smart purchasing decisions can significantly impact your bottom line as a new artist. The cost difference between premium and standard films might seem minimal per client, but multiplies quickly across your client base.
Entry-level studio options typically range from $0.75-1.25 per application when purchased in bulk rolls. These films provide adequate protection but may have less consistent adhesion or vapor transmission rates.
Mid-tier professional films ($1.50-2.50 per application) offer improved breathability and client comfort—a worthwhile investment as you build your reputation.
Premium medical-grade options ($3.00-4.00 per application) provide superior healing environments and can become a selling point for your service.
Bulk purchasing strategies that make financial sense:
- Start with smaller quantities (25-50 applications) until you identify your preferred brand
- Consider splitting larger bulk orders with other artists to access volume discounts
- Look for manufacturer programs that offer sample packs before committing to large quantities
- Factor film costs into your pricing structure rather than treating it as overhead
Client Aftercare Instructions for Optimal Results
The best film in the world fails without proper client education. Develop clear, concise aftercare instructions specific to your chosen film.
Essential elements to include:
- Precise wearing duration (typically 24-72 hours depending on film type)
- Visual indicators for when removal is necessary (excessive fluid buildup, edge lifting)
- Proper removal technique (slow, parallel to skin, using oil-based products if needed)
- Post-film care instructions (gentle cleansing, appropriate moisturizing)
Create a visual guide showing what normal healing looks like under your preferred film. This reduces panic calls about normal healing processes like fluid collection or mild redness.
Remember that client compliance dramatically impacts results—clear instructions delivered both verbally and in writing maximize success rates.
Your film choice becomes part of your signature as an artist. The right selection balances protection, healing optimization, and client comfort while remaining practical for your business model.
Discover the top 3 occlusive protective films for new tattoo artists. Learn how to select between medical-grade polyurethane, hydrocolloid bandages, and transparent adhesive dressings based on tattoo style, placement, and budget considerations.
Discover the top 3 occlusive protective films for new tattoo artists. Learn how to select between medical-grade polyurethane, hydrocolloid bandages, and transparent adhesive dressings based on tattoo style, placement, and budget considerations.