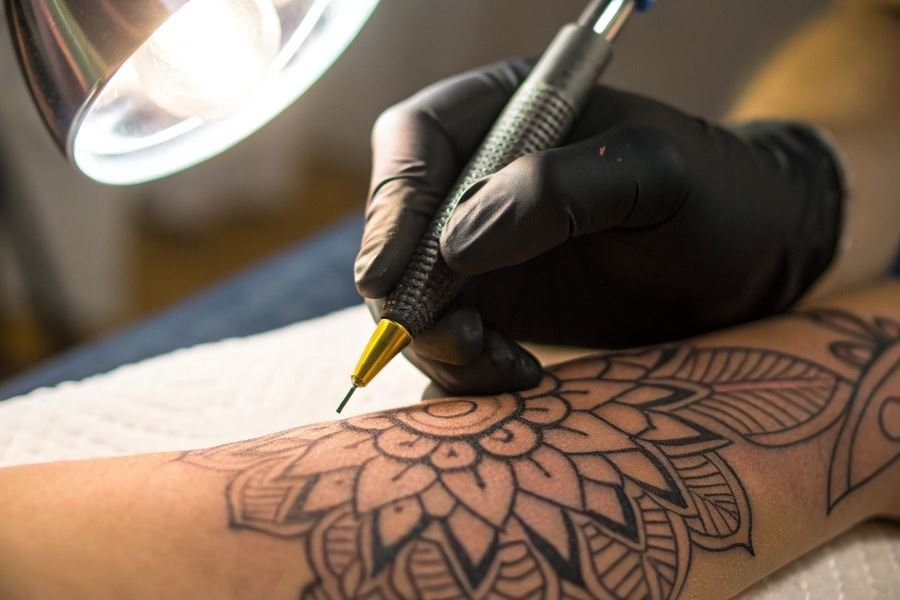
Ever watched a tattoo artist sketch directly on skin before the needle even touches it? That preliminary dance between pencil and canvas isn’t just artistic foreplay—it’s the critical foundation that can make or break your permanent body art.
Tattoo marking with pencils represents the unsung hero of the tattoo process. Before the buzz of machines and the commitment of ink, artists use specialized pencils to map out designs with precision that stencils alone can’t always achieve. This crucial step allows for real-time adjustments and personalization that transforms good tattoos into exceptional ones.
The beauty of pencil marking lies in its simplicity and control. Unlike pre-made stencils, pencils allow artists to follow the natural contours of your body, creating designs that truly complement your unique anatomy. They’re particularly valuable for freehand work, where artists can respond to muscle structure and skin texture in ways that digital designs simply can’t anticipate.
Essential supplies for your marking toolkit:
- Skin-safe marking pencils (cosmetic grade, non-toxic)
- Surgical skin markers for fine details
- Alcohol wipes for corrections
- Reference images printed at actual size
- Good lighting (natural light preferred)
The pencil-to-skin technique bridges the gap between concept and execution, giving both artist and client a preview of the final result. This visual confirmation before committing to ink has saved countless tattoos from becoming regrets, making it an indispensable part of the professional tattoo process.
Precision Marking: Mastering the Pencil for Tattoo Design
The humble pencil—a tool that bridges the gap between artistic vision and permanent body art. While digital stencils have their place, many tattoo artists still swear by the control and flexibility that pencil marking provides. The technique of using a pencil for tattoo marking requires attention to detail and proper preparation, but yields remarkable precision when executed correctly.
Before diving into the actual tattooing process, artists need to master the preliminary step of design transfer. How to use a pencil for tattoo marking: step-by-step instructions begins with proper skin preparation and ends with a flawless template that guides the needle work. This traditional method remains relevant even as technology advances in the tattoo industry.
Preparing the Canvas: Skin Surface Preparation
The success of pencil marking hinges on proper skin preparation. Start by thoroughly cleaning the area with antibacterial soap and warm water. After drying, apply a thin layer of alcohol-based cleanser to remove natural oils that might prevent the graphite from adhering properly.
For optimal results, apply a thin layer of stencil prep solution or witch hazel to slightly dampen the skin. This creates the perfect surface tension for graphite transfer without causing smudging. Allow this to become tacky—approximately 30-45 seconds—before proceeding.
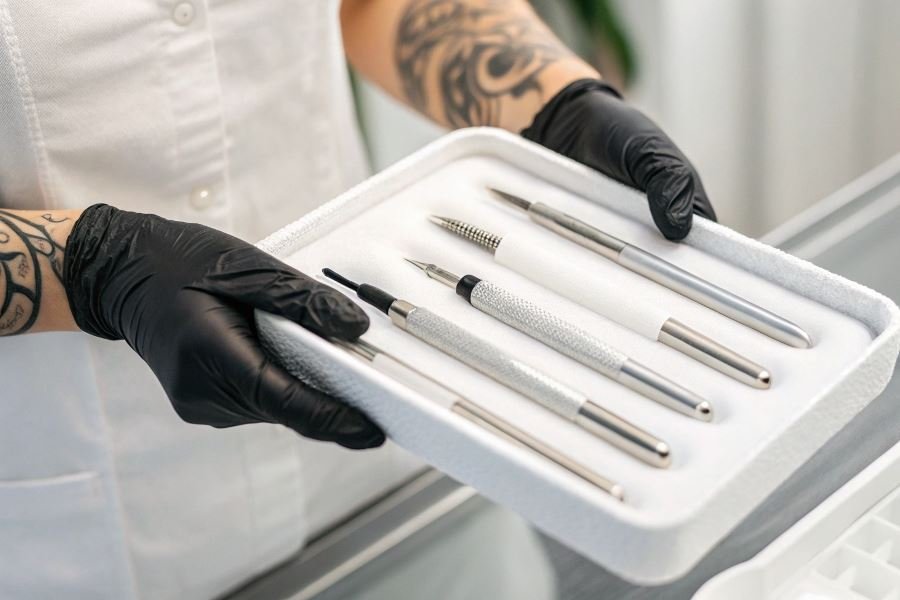
Selecting Your Marking Tool
Not all pencils are created equal when it comes to skin marking:
| Pencil Type | Hardness | Best For | Notes |
|---|---|---|---|
| Graphite | 2H-4H | Fine lines, precision work | Less smudging, lighter marks |
| Graphite | HB-2B | Shading guides, broader areas | More visible, higher smudge risk |
| Colored | Hard | Color zone marking | Useful for complex designs |
The ideal pencil for most tattoo marking is a high-quality 2H graphite pencil. Sharpen it to a needle-fine point using a metal sharpener rather than an electric one—the former creates a more precise tip without overheating the graphite.
Transferring Your Design with Precision
For transferring pre-drawn designs, the reverse transfer method yields exceptional results:
- Draw your design on tracing paper using a soft pencil (2B or softer)
- Flip the paper over and place it pencil-side down on the prepared skin
- Apply firm, even pressure with a rounded tool like a spoon back
- Lift carefully from one corner to avoid smudging
For freehand work directly on skin, hold your pencil at a 45-degree angle and apply minimal pressure. This prevents skin indentation while still creating visible lines. Work from the center outward to minimize smudging from hand contact.
Creating Precision Guides and Shading Maps
The true artistry of pencil marking emerges in the detailing phase. Use your sharpened 2H pencil to create crisp outline boundaries first. These serve as your non-negotiable borders. Within these boundaries, switch to a slightly softer HB pencil to indicate shading zones with light hatching.
For complex designs requiring multiple shading depths, develop a personal notation system—perhaps dots for light shading, cross-hatching for medium, and small circles for deep saturation areas. This creates a comprehensive roadmap that remains visible through the first pass of tattooing.
Once your marking is complete, set it with a light mist of fixative spray designed for cosmetic use. Hold the spray 8-10 inches away and apply just enough to stabilize the graphite without creating a thick layer that might interfere with needle work.
This meticulous approach to pencil marking creates the foundation for exceptional tattoo work—proving that sometimes the oldest tools remain the most reliable when placed in skilled hands.
Mastering the Art of Pencil Tattoo Marking
When precision meets artistry in the tattoo world, your marking technique becomes the unsung hero of the entire process. Professional tattoo artists know that a well-executed pencil mark can make the difference between a good tattoo and a masterpiece. Let’s dive into the troubleshooting, longevity techniques, and safety considerations that separate amateur marking from professional-grade preparation.
Solving common pencil marking challenges
Even experienced artists encounter marking issues. The most frequent problem? Smudging during transfer. Combat this by applying a thin layer of Stencil Stuff or witch hazel to the skin before placing your pencil marks. This creates a slightly tacky surface that helps the graphite adhere properly.
Another common headache is marks that fade too quickly. The solution lies in pencil selection—opt for a 2B or 4B graphite pencil rather than harder leads. These softer leads deposit more graphite and create more visible, longer-lasting marks.
Skin texture variations can cause inconsistent lines. For oily skin, gently cleanse with alcohol before marking. For extremely dry skin, a light moisturizer applied 30 minutes before marking (and then wiped clean) creates an ideal surface.
Extending mark longevity during sessions
The secret to marks that last through a full tattoo session? Layering technique. Rather than pressing hard for a single dark line, build up your marks with multiple light passes. This embeds the graphite more effectively without traumatizing the skin.
Consider this comparison of marking longevity techniques:
| Technique | Longevity | Best For | Drawbacks |
|---|---|---|---|
| Standard pencil | 1-2 hours | Quick sessions | Fades quickly with wiping |
| Layered pencil | 3-4 hours | Detailed work | Takes more time initially |
| Pencil + setting spray | 4-5 hours | Full-day sessions | Requires additional products |
| Surgical skin marker | 6+ hours | Multi-session pieces | More difficult to adjust |
For maximum staying power, try this professional technique: after completing your pencil marks, lightly mist the area with a medical-grade skin prep solution like Skin-Prep. Allow it to dry completely before beginning your tattoo work. This creates a thin, transparent barrier that helps protect your marks from wiping and sweating.
Safety first: protecting your client
While pencil marking is generally safe, certain precautions ensure client comfort and health. Never use colored pencils on skin—they contain dyes and waxes not tested for dermal contact. Stick with standard graphite pencils, preferably those labeled non-toxic.
For clients with sensitive skin, perform a small test mark in an inconspicuous area before creating your full design. Wait 5-10 minutes to check for any adverse reaction.
After the tattoo session, ensure all pencil marks are thoroughly removed. Graphite residue can potentially interfere with healing if left under bandages. A gentle cleanser with lukewarm water is usually sufficient to remove all traces.
Remember that pencil marks should never be applied to broken or irritated skin. If you encounter skin conditions that concern you, postpone the tattoo session until the skin has fully healed.
By mastering these professional pencil marking techniques, you’ll create the perfect foundation for exceptional tattoo work—ensuring clean lines, precise placement, and ultimately, delighted clients who become walking advertisements for your artistic skill.
Discover the art of pencil tattoo marking with our comprehensive step-by-step guide. Learn proper skin preparation, pencil selection techniques, and professional tips for creating perfect stencils that ensure tattoo precision.
Discover the art of pencil tattoo marking with our comprehensive step-by-step guide. Learn proper skin preparation, pencil selection techniques, and professional tips for creating perfect stencils that ensure tattoo precision.