
Ever noticed how a professional manicure leaves your nails looking impossibly clean and refined? The secret often lies in a tiny tool that most home nail enthusiasts overlook: the cuticle curette. This unassuming instrument can be the difference between amateur results and salon-quality perfection.
What exactly are cuticle curettes?
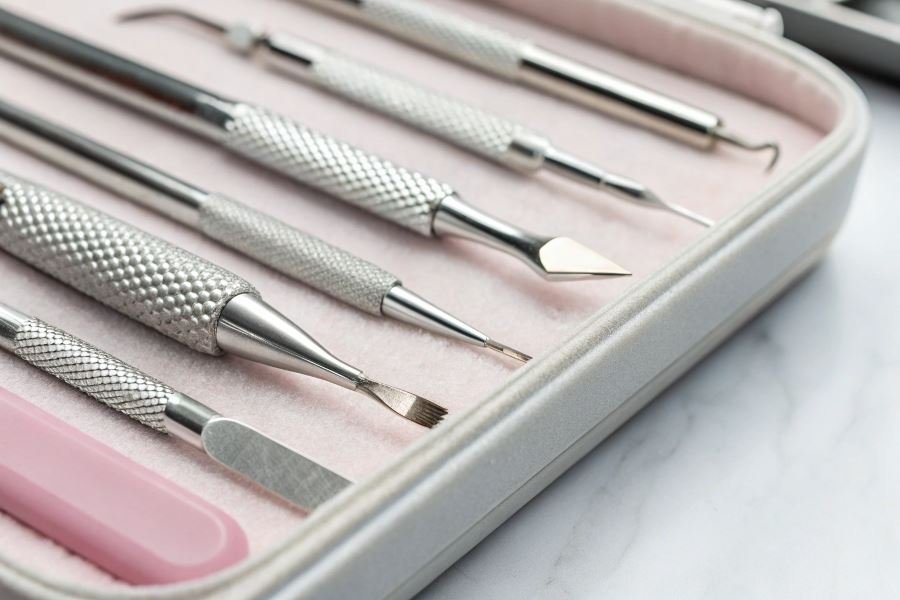
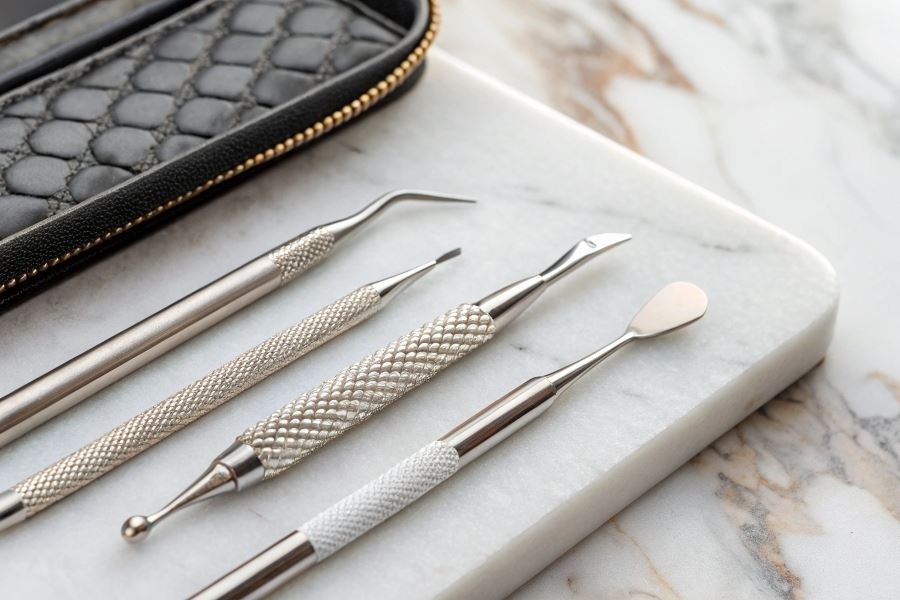
Cuticle curettes are precision instruments designed to gently remove excess cuticle tissue and clean the nail plate without damaging the living tissue. Unlike clippers that cut, curettes use a scooping motion to lift and remove dead skin with remarkable precision. They feature a long handle for control and a curved end (the “spoon”) that does the actual work.
“The curette is to nail care what the sculptor’s chisel is to marble—it reveals the beauty by removing what doesn’t belong.” — Professional nail technician insight
Types of curettes for every need
Professional-grade curettes typically come in stainless steel with varying spoon sizes and angles. They’re designed for durability and can be properly sterilized between clients. For home use, you’ll find more affordable options in surgical steel or even plastic versions for beginners. Double-ended tools offer versatility with different spoon sizes on each end—smaller for detailed work around nail corners, larger for efficient removal along straight edges.
Essential preparation before your first scoop
Before wielding this powerful tool, preparation is crucial:
- Soften the cuticles with a warm soak or dedicated cuticle remover
- Sanitize your tools thoroughly to prevent infection
- Ensure good lighting to clearly see what you’re working with
- Position your hand on a stable surface to minimize movement
The right preparation transforms cuticle maintenance from potentially damaging to therapeutic and effective.
Mastering the Curette: Precision Nail Care Technique
The difference between amateur and professional nail care often comes down to technique—particularly when handling specialized tools like curettes. These precision instruments, designed to gently remove excess cuticle tissue, require a methodical approach that balances effectiveness with safety. Learning how to properly use curettes for cuticle treatment transforms your nail care routine from basic maintenance to a professional-grade service.
The foundation of proper grip
Your hand position creates the foundation for successful cuticle work. Hold the curette like a pencil, with your thumb and index finger gripping the handle approximately one inch from the working end. Your middle finger should rest lightly against the side for stability. This three-point grip provides maximum control while minimizing hand fatigue during detailed work.
Critical tip: Rest your pinky finger on the client’s hand (or your own) to create an anchor point. This stabilizes your working hand and prevents accidental slips that could damage the nail bed.
The professional difference emerges in how you position your wrist—keep it relaxed but firm, creating a straight line from your elbow to the curette tip. This ergonomic alignment reduces strain during longer sessions and improves precision.
Angle and pressure management
The correct angle of approach prevents damage while ensuring effective cuticle removal. Position the curette at a 30-45° angle to the nail plate—never perpendicular, which risks puncturing the skin.
Pressure control represents the most common challenge for beginners. Apply only enough force to gently lift and remove loose cuticle tissue. The sensation should be similar to:
Light as a feather for dry cuticles
Barely perceptible for softened cuticles
| Cuticle Condition | Pressure Level | Visual Indicator |
|---|---|---|
| Dry/Tough | Light-moderate | Tool slightly bends |
| Pre-soaked/Soft | Very light | Minimal tool movement |
| Damaged/Thin | Extremely gentle | Barely touching surface |
Warning: If you feel resistance, stop immediately. Never force the curette against stubborn cuticle tissue—this indicates either incorrect angle or insufficient preparation.
Zone-specific techniques
Different areas around the nail require specialized movements for optimal results:
Side walls technique
For the lateral nail folds, use short, gentle sweeping motions moving from the base toward the free edge. Keep the curette parallel to the natural curve of the nail. This area requires the lightest touch as the skin is particularly sensitive.
Proximal fold approach
The proximal nail fold (the “U” shaped area at the base) demands precision. Use the curette in tiny, controlled pushing motions—never pulling or digging. Work from the center outward in small increments, lifting only the visible loose tissue.
Underneath the free edge
When addressing the hyponychium (the skin beneath the free edge), turn the curette so the spoon faces upward. Use gentle scooping motions to remove debris without applying pressure against the sensitive skin attachment.
The mastery of these zone-specific techniques elevates your cuticle care from functional to exceptional. Professional nail technicians develop an almost intuitive sense for how different areas respond to the curette, adjusting their approach accordingly.
Remember that proper technique extends the life of your tools—Tweezerman and Pusher & Cuticle Nippers both recommend cleaning your curettes after each use to maintain their precision edges and prevent cross-contamination.
Aftercare and Maintenance: Elevating Your Cuticle Treatment
The difference between a professional-looking manicure and an amateur attempt often lies in what happens after the cuticle work is complete. Your curettes have done their precision work—now let’s ensure those results last while keeping your tools in pristine condition for years to come.
Healing the boundary
Post-treatment care is non-negotiable if you want truly healthy cuticles. After using curettes, your cuticle area needs immediate attention to prevent irritation and promote healing.
Apply a vitamin E-enriched cuticle oil immediately after treatment—this creates a protective barrier while delivering nutrients to the newly exposed nail matrix. The molecular structure of quality oils like jojoba penetrates deeper than creams, offering superior hydration when tissues are most receptive.
Pro tip: Keep your hands dry for at least two hours post-treatment. Water exposure can introduce bacteria to freshly worked cuticles and potentially cause inflammation.
Many professionals recommend a 24-hour intensive care protocol:
“The first day after cuticle work determines whether you’ll see inflammation or perfection. Treat those first 24 hours like you’re nursing fine leather back to life.” — Nail care specialist
Apply cuticle oil 3-4 times during the first day, followed by a lanolin-based hand cream to lock in moisture. This combination creates the optimal environment for cuticle regeneration.
Tool maintenance that matters
Your curettes deserve the same meticulous care you give your nails. Proper sanitization isn’t just about hygiene—it directly impacts tool performance and longevity.
After each use:
- Rinse curettes under warm running water to remove visible debris
- Scrub with a small brush and antibacterial soap
- Sanitize in 70% isopropyl alcohol for a minimum of 10 minutes
- Dry completely before storage
For stainless steel curettes, monthly maintenance should include checking for dullness and applying a thin layer of mineral oil to prevent oxidation.
Never store curettes in closed containers while damp—this creates the perfect environment for bacterial growth and can accelerate corrosion of even high-quality metals.
Timing your treatments perfectly
The frequency of cuticle treatments depends on your nail growth cycle and daily activities. Most professionals recommend a complete curette treatment every 2-3 weeks for optimal results.
| Activity Level | Recommended Frequency | Special Considerations |
|---|---|---|
| Office workers | Every 3 weeks | Focus on moisturizing between treatments |
| Manual laborers | Every 2 weeks | Additional protective measures needed |
| Frequent hand-washers | Every 2-3 weeks | Daily cuticle oil application essential |
| Nail biters | Every 2 weeks | Gentle technique crucial |
Warning: Overzealous cuticle work can damage the nail matrix. If you notice redness, swelling, or tenderness, extend the time between treatments.
For maintenance between full treatments, limit yourself to gentle pushing with an orange stick after showering when cuticles are soft. This prevents buildup without risking damage to delicate tissues.
Remember that seasonal changes affect cuticle health dramatically. Winter typically requires more frequent moisturizing but potentially less aggressive cuticle removal, while summer’s increased growth rate might necessitate slightly more frequent treatments.
By following these aftercare protocols and maintenance schedules, your cuticles will remain healthy, your nails will grow stronger, and your curettes will deliver professional results for years to come.
Discover professional techniques for using cuticle curettes safely and effectively. Learn proper grip, angle, and pressure methods for perfect cuticle removal, plus essential aftercare tips for healthy, beautiful nails.
Discover professional techniques for using cuticle curettes safely and effectively. Learn proper grip, angle, and pressure methods for perfect cuticle removal, plus essential aftercare tips for healthy, beautiful nails.