Ever glanced at your phone during a business trip and wondered, “Is everything okay back at the shop?” Remote access to surveillance systems isn’t just a tech luxury—it’s becoming the backbone of modern security management for property owners who value both protection and peace of mind.
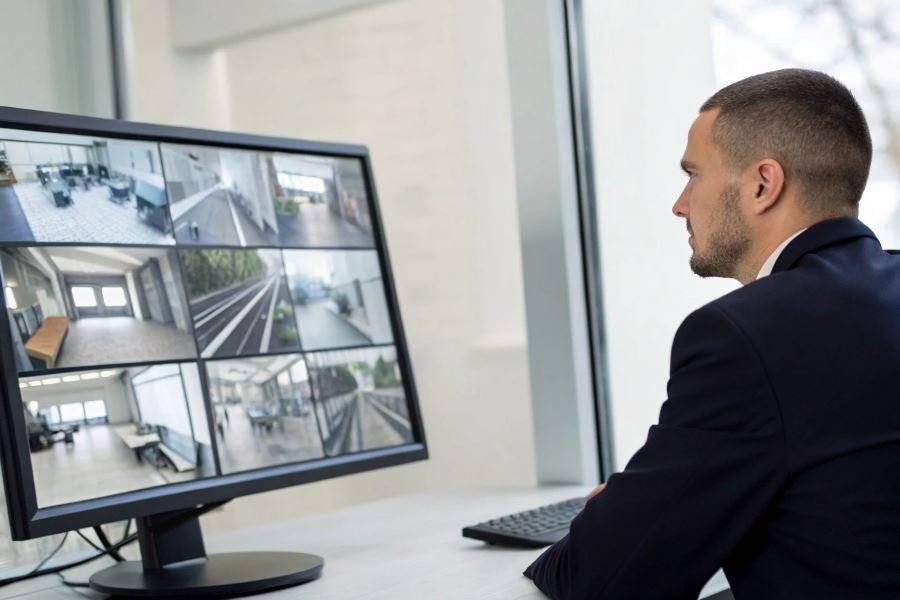
Remote surveillance access fundamentally changes how we interact with security systems. Instead of being tethered to an on-site monitor, you gain the freedom to check camera feeds, review recordings, and manage alerts from anywhere with an internet connection. This capability transforms static security cameras into dynamic tools that serve you whether you’re across town at a meeting or across the country closing a deal.
Today’s surveillance ecosystem offers remarkable diversity. Traditional DVR (Digital Video Recorder) systems excel at reliability and local storage, while modern NVR (Network Video Recorder) solutions provide superior image quality and easier remote setup. Cloud-based systems eliminate most hardware concerns entirely, though they typically require subscription fees ranging from $10-50 monthly depending on storage needs.
Before diving into remote access setup, ensure you have:
- A compatible video recorder with network capabilities
- Stable internet connection (minimum 5Mbps upload speed for HD footage)
- Router access for port forwarding configuration
- Strong, unique passwords for all system components
“The most common mistake business owners make isn’t choosing the wrong system—it’s failing to properly secure their remote access points.” — Security industry insight
Understanding these fundamentals creates the foundation for a surveillance system that works for you, not just when you’re physically present, but whenever and wherever security matters.
Unlocking Your Surveillance System Remotely
Setting up remote access to your surveillance system’s video recorder transforms how you monitor your property. No longer tethered to on-site viewing, you gain the freedom to check camera feeds from anywhere with an internet connection. The process involves three critical configurations that work together to create a secure, accessible surveillance solution.
Many property owners invest thousands in sophisticated surveillance equipment but miss the opportunity to maximize their system’s potential through remote access setup. Configuring remote viewing capabilities for your surveillance system’s video recorder requires attention to detail but delivers tremendous value through enhanced security awareness and peace of mind.
Network configuration essentials
Your video recorder needs proper network settings before it can communicate beyond your local network. Begin by connecting your Network Video Recorder (NVR) or Digital Video Recorder (DVR) to your router using an Ethernet cable for stability. Access the recorder’s menu system and navigate to network settings, where you’ll need to:
- Enable DHCP to automatically receive an IP address, or manually assign a static IP (recommended for consistent access)
- Verify your subnet mask matches your network configuration (typically 255.255.255.0)
- Enter your router’s IP address as the default gateway
- Configure DNS settings using your ISP’s servers or public options like Google DNS (8.8.8.8)
Most modern recorders from manufacturers like Hikvision or Dahua include a setup wizard that streamlines this process. Document all settings for troubleshooting purposes.
Router port forwarding mastery
Port forwarding acts as your surveillance system’s doorway to the outside world. This critical step tells your router which internal device should receive external connection requests.
To configure port forwarding:
- Access your router’s administration panel (typically by entering 192.168.1.1 or 192.168.0.1 in your browser)
- Locate the port forwarding section (sometimes under “Advanced Settings” or “Virtual Server”)
- Create a new rule specifying:
- The internal IP address of your video recorder
- The external and internal port numbers (standard ports include 80, 554, and 8000, though using non-standard ports enhances security)
- The protocol (TCP, UDP, or both depending on your recorder’s requirements)
Security insight: Using high-numbered ports (above 10000) reduces vulnerability to automated scanning attacks while maintaining full functionality.
Different router brands organize these settings differently. Netgear places them under “Advanced” while TP-Link typically uses “Forwarding.”
Mobile and desktop application setup
The final piece involves installing the appropriate software to access your feeds remotely. Most manufacturers offer dedicated applications that optimize the viewing experience.
For mobile devices:
- Download your recorder’s official app from the App Store or Google Play
- Launch the app and select “Add Device”
- Enter connection details including:
- Device name (for your reference)
- Serial number or QR code scan (found on the recorder or its documentation)
- IP address or DDNS hostname
- Port number (as configured in port forwarding)
- Username and password
Desktop applications follow similar steps but often provide additional features like multi-camera grid views and enhanced export capabilities.
For maximum flexibility, consider cloud-based options that eliminate the need for complex port forwarding. Services like Eagle Eye Networks or Verkada offer subscription-based remote access with enterprise-grade security features.
Testing your connection from both your home network and cellular data ensures everything works properly before you need to rely on remote access during a critical situation.
Mastering Remote Surveillance: Troubleshooting and Security
When Your Connection Fails You
Remote access to surveillance systems can be transformative for property management, but connectivity issues often derail even the most carefully planned setups. The three most persistent problems users encounter include router configuration errors, dynamic IP complications, and port forwarding failures.
Router configuration issues typically manifest when your network equipment lacks proper setup for external connections. Many modern routers include built-in firewalls that block incoming connection attempts as a security measure. The solution? Access your router’s administration panel (typically at 192.168.1.1 or 192.168.0.1) and verify that UPnP (Universal Plug and Play) is enabled, or manually configure port forwarding rules for your DVR/NVR.
Dynamic IP address challenges represent another significant hurdle. Most residential internet connections use dynamic IPs that change periodically, breaking your remote access configuration. This issue can be resolved by:
- Setting up a DDNS (Dynamic DNS) service like No-IP or DynDNS
- Configuring your recorder to update this service automatically
- Using the DDNS hostname instead of IP addresses in your remote access apps
Port forwarding failures round out the troubleshooting trinity. When properly configured ports remain inaccessible, the culprit is often ISP restrictions or double-NAT scenarios (common with ISP-provided modems connected to secondary routers).
Tech Insight: Test your port forwarding success using online tools like PortChecker before spending hours troubleshooting mobile apps.
Fortifying Your Digital Perimeter
Remote access creates convenience but introduces security vulnerabilities. Implement these three critical security measures to protect your surveillance system:
Strong authentication protocols form your first line of defense. Replace default passwords with complex credentials (minimum 12 characters combining uppercase, lowercase, numbers, and symbols). Better yet, implement two-factor authentication where supported by your Hikvision, Dahua, or other surveillance equipment.
Encrypted connections prevent data interception during transmission. Configure your system to use HTTPS/SSL for web interfaces and encrypted protocols for mobile connections. Many modern NVRs support automatic encryption, but older systems may require manual configuration or firmware updates.
Network segmentation isolates your cameras from other devices. Create a dedicated VLAN for surveillance equipment, preventing lateral movement if other network devices become compromised.
Maintaining Reliable Remote Access
Consistent remote visibility requires ongoing maintenance. Follow these best practices to ensure your system remains accessible when you need it most:
-
Schedule regular firmware updates for both your recorder and cameras. Manufacturers frequently patch security vulnerabilities and improve remote access functionality.
-
Implement automated health checks using monitoring tools that alert you to connectivity issues before they become critical.
-
Document your configuration thoroughly, including port numbers, credentials (stored securely), and network settings.
-
Create backup remote access methods such as VPN connections that provide alternative paths to your system when primary methods fail.
| Access Method | Security Level | Ease of Setup | Best For |
|---|---|---|---|
| Port Forwarding | Moderate | Moderate | Small systems |
| VPN | High | Complex | Security-critical installations |
| Cloud Services | Varies | Simple | Convenience-focused users |
| P2P Connections | Moderate | Simple | Quick deployment |
Maintaining reliable remote access isn’t just about initial setup—it’s an ongoing commitment to system integrity that pays dividends in accessibility and peace of mind.
Learn how to set up remote access to your surveillance system's video recorder with our comprehensive guide. Monitor your security cameras from anywhere using proper network configuration, port forwarding, and mobile apps.
Learn how to set up remote access to your surveillance system's video recorder with our comprehensive guide. Monitor your security cameras from anywhere using proper network configuration, port forwarding, and mobile apps.