Ever watched a perfectly smooth concrete surface being created and wondered how professionals achieve that flawless finish? The secret weapon in their arsenal is often a vibratory screed—a tool that transforms what would be backbreaking labor into precision craftsmanship.
At its core, a vibratory screed is an engineered marvel designed to consolidate, compact, and level freshly poured concrete. These specialized tools use controlled vibration to eliminate air pockets while simultaneously creating a perfectly level surface. The vibration causes the concrete particles to settle naturally, bringing excess water to the surface (known as “bleeding”) and creating a dense, strong foundation for whatever structure you’re building.
Types of vibratory screeds for every project
The market offers several distinct varieties to match your specific needs:
- Roller screeds: Featuring rotating tubes that smooth the surface while moving across wet concrete
- Truss screeds: Ideal for larger commercial projects with spans up to 50 feet
- Wet screeds: Perfect for residential work and smaller slabs
- Laser-guided screeds: The premium option offering unparalleled precision for critical applications
Each type brings unique advantages depending on your project scale, budget, and required finish quality.
Safety first: Before you power up
Working with vibratory screeds demands respect for both the tool and material. Always wear appropriate PPE including:
- Hearing protection (vibration levels can exceed 90 decibels)
- Safety glasses to protect against concrete splatter
- Respiratory protection against silica dust
- Vibration-dampening gloves to prevent hand-arm vibration syndrome
Remember: Proper training isn’t just about quality—it’s about returning home safely after the job is done.
Mastering the Vibratory Screed: Essential Steps for Success
Pre-operation preparation and inspection
The difference between a professional concrete finish and an amateur one often comes down to preparation. Before firing up your vibratory screed, conduct a thorough equipment inspection that covers every component. Check the engine oil levels, fuel system, and vibration mechanism for any signs of wear or damage. A properly maintained vibratory screed not only delivers superior results but also extends the equipment’s lifespan by up to 40%.
When preparing to properly use a vibratory screed when pouring concrete, remember that the condition of your screed rails is non-negotiable. These rails serve as your guide path and directly influence the flatness of your finished surface. Ensure they’re firmly secured, perfectly level, and set at the correct height for your desired concrete thickness.
Pre-operation checklist worth memorizing:
- Verify all fasteners are tight and secure
- Test the engine at low RPM before deployment
- Inspect vibration mechanism for loose components
- Check blade edges for straightness and damage
- Confirm fuel levels for uninterrupted operation
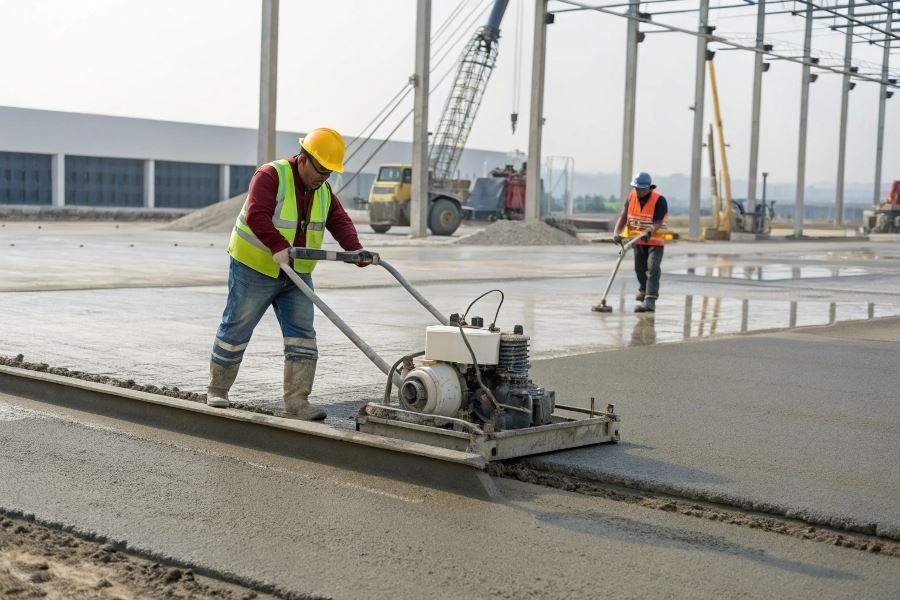
Positioning and movement techniques
The magic of a vibratory screed happens in how you position and move it across the pour. Start by positioning the screed perpendicular to the direction you’ll be moving, with the blade resting firmly on your screed rails or forms.
The most common mistake is rushing the pull. Move too quickly, and you’ll leave voids; too slowly, and you risk over-vibration that causes aggregate separation.
For optimal results, maintain a consistent pulling speed of approximately 3-5 feet per minute, depending on your concrete mix design. The pull should be smooth and continuous—any stops will create visible lines in your finished surface.
Movement technique fundamentals:
- Pull the screed with steady, even pressure
- Maintain consistent forward momentum
- Keep the screed perpendicular to the direction of travel
- Overlap previous passes by 4-6 inches
- Lift the screed at the end of each pass, never drag it backward
Optimal vibration settings for different mixes
Vibration settings aren’t one-size-fits-all—they should be calibrated to your specific concrete mix. Higher-slump mixes (6+ inches) require less vibration energy, typically 3,000-4,000 VPM (vibrations per minute). For stiffer, low-slump mixes (1-3 inches), increase to 4,000-5,000 VPM to ensure proper consolidation.
| Concrete Mix Type | Recommended VPM | Pull Speed (ft/min) | Special Considerations |
|---|---|---|---|
| High-slump (6″+) | 3,000-4,000 | 4-5 | Watch for segregation |
| Medium (3-5″) | 3,500-4,500 | 3-4 | Balanced approach |
| Low-slump (1-3″) | 4,000-5,000 | 2-3 | May require multiple passes |
| Fiber-reinforced | 3,500-4,500 | 3-4 | Monitor fiber distribution |
The vibration amplitude matters as much as frequency. For thicker slabs (6+ inches), use higher amplitude settings on equipment like the Wacker Neuson P35A that offers adjustable settings. For thin overlays or toppings, reduce amplitude to prevent pushing aggregate too far from the surface.
Remember that over-vibration can be as problematic as under-vibration. Watch for signs of excessive vibration: water or cement paste rising to the surface, aggregate settling, or air bubbles appearing. These indicators signal it’s time to adjust your settings or increase your pull speed.
Mastering Vibratory Screed Challenges
Diagnosing common screed problems
When your vibratory screed isn’t performing as expected, troubleshooting quickly saves both time and material. Engine stalling during operation typically indicates fuel issues or an overloaded screed. The solution? Check your fuel mixture ratios and ensure you’re not attempting to level too much concrete at once. For gas-powered models like the Wacker Neuson P35A, maintaining the recommended 50:1 fuel-to-oil ratio prevents most operational hiccups.
Uneven vibration—that telltale “jumping” motion—often stems from blade imbalance or worn eccentric weights. Inspect and clean the blade assembly, checking for concrete buildup that creates imbalance. If vibration persists after cleaning, the eccentric weights may need adjustment or replacement.
The difference between amateur and professional concrete work often comes down to how quickly you identify and solve equipment issues before they affect the finished surface.
For electric models experiencing power loss, check your generator capacity. Most electric screeds require at least 2000 watts of continuous power—anything less creates inconsistent vibration and poor finishing results.
Extending equipment life through proper care
Vibratory screeds represent a significant investment, with professional models ranging from $2,000 to $7,000. Protecting this investment starts with post-pour cleaning. Never allow concrete to cure on your equipment—remove all material within 15 minutes of completing work using pressurized water.
Maintenance schedules matter tremendously:
| Maintenance Task | Frequency | Impact on Lifespan |
|---|---|---|
| Engine oil check | Before each use | Prevents premature wear |
| Blade inspection | Weekly | Maintains finish quality |
| Bearing lubrication | Monthly | Reduces vibration damage |
| Belt tension check | Every 50 hours | Prevents transmission failure |
For hydraulic models, fluid inspection is critical. Cloudy hydraulic fluid indicates water contamination that can destroy internal components. Change hydraulic fluid annually even with minimal use—the cost of $40 for premium fluid is insignificant compared to a $1,500 pump replacement.
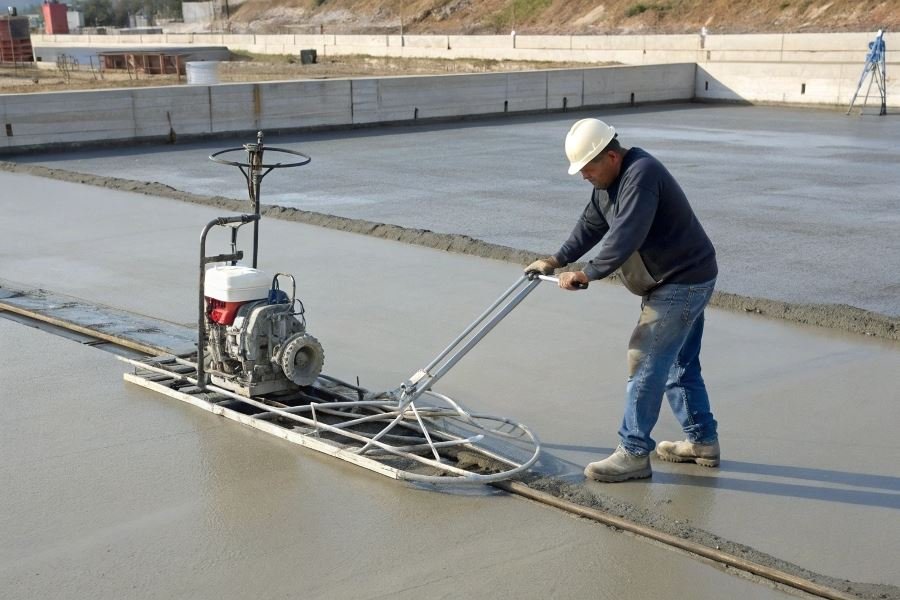
Achieving professional-grade finishes
Professional finishers distinguish themselves through technique, not just equipment quality. The “two-pass method” delivers superior results: first pass with higher amplitude vibration to consolidate material, followed by a second pass at lower vibration for surface finishing.
Timing these passes correctly is crucial. The concrete should still be plastic but not bleeding water during the first pass. For the second pass, wait until finger pressure leaves a slight impression without accumulating paste on your finger.
Control your walking speed—consistency matters more than speed. Professionals maintain a steady 3-5 feet per minute pace, adjusting based on concrete slump. Wetter mixes (5-6 inch slump) require slower movement to allow proper consolidation.
For exposed aggregate finishes, use a Husqvarna BV20H or similar model with adjustable vibration frequency. Set to 3500-4000 VPM (vibrations per minute) for optimal aggregate settlement without excessive cream rising.
Temperature affects finishing windows dramatically. In hot conditions above 85°F, consider adding retarders to your mix and scheduling pours for early morning. Cold weather below 50°F requires the opposite approach—accelerators and afternoon pours maximize working time.
By addressing these common challenges with systematic troubleshooting, disciplined maintenance, and refined technique, your vibratory screed becomes a precision tool capable of delivering consistently excellent concrete finishes that stand the test of time.
Discover expert techniques for using vibratory screeds to achieve flawless concrete surfaces. Learn proper positioning, optimal vibration settings, and maintenance tips that ensure professional-quality results for your concrete projects.
Discover expert techniques for using vibratory screeds to achieve flawless concrete surfaces. Learn proper positioning, optimal vibration settings, and maintenance tips that ensure professional-quality results for your concrete projects.