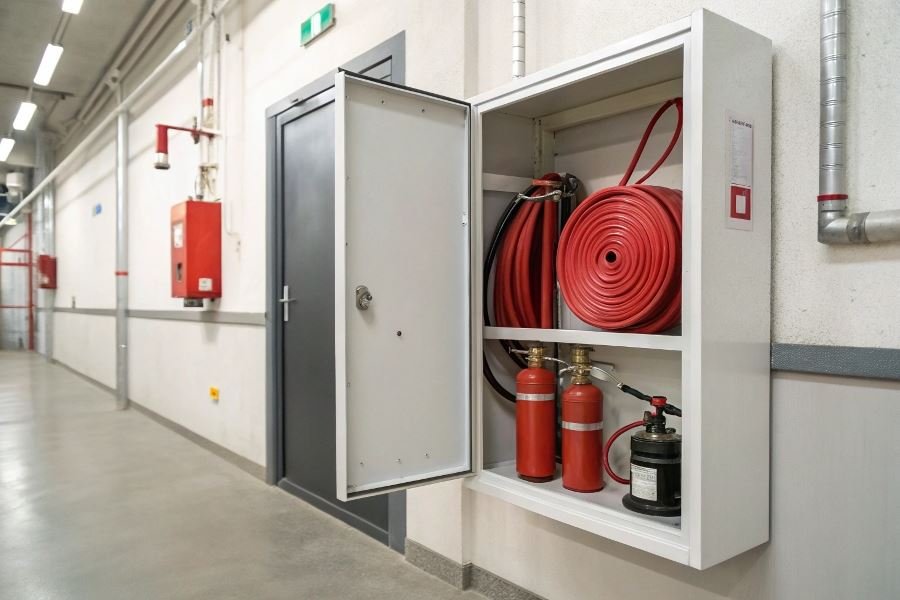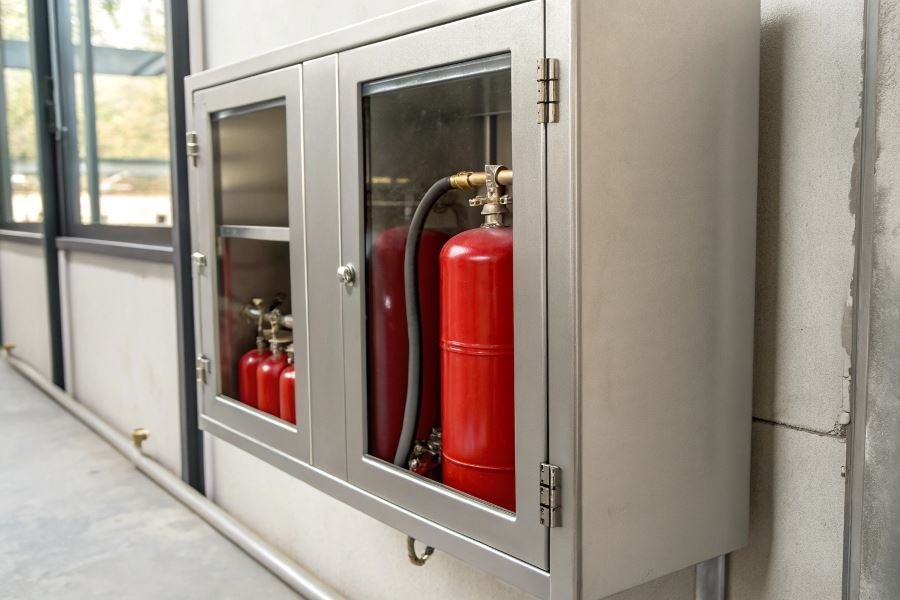

Ever wondered what stands between a small flame and a devastating inferno? Often, it’s that red cabinet mounted on the wall. Fire cabinets aren’t just building decorations—they’re your first line of defense when seconds count.
Taking fire safety into your own hands starts with understanding what you’re working with. Fire cabinets come in several varieties: recessed (built into walls), surface-mounted (attached to wall surfaces), and standalone models. Each serves a specific purpose in your comprehensive fire safety strategy. The National Fire Protection Association has documented that properly installed fire equipment can reduce property damage by up to 65% during fire incidents.
Before grabbing your tools, let’s assemble what you’ll need: a drill with masonry bits, level, measuring tape, pencil, screwdriver set, and appropriate anchors for your wall type. For heavier cabinets, you might need a stud finder and mounting brackets. The cabinet itself should come with installation hardware, but verify this before starting—nothing halts a safety project faster than missing parts!
Safety first: Preparation is protection
Working with fire safety equipment demands proper precautions. Always check local building codes and fire regulations—these vary by municipality and building type. Most jurisdictions require fire cabinets to be installed at specific heights and locations for maximum accessibility during emergencies.
Remember: A properly installed fire cabinet isn’t just about compliance—it’s about ensuring that when panic strikes, life-saving equipment is exactly where it needs to be, ready to perform flawlessly.
Mastering Fire Cabinet Installation Like a Pro
When safety equipment installation becomes a DIY project, precision matters more than convenience. Fire cabinets represent critical safety infrastructure that demands proper installation to function effectively during emergencies. The process of properly installing a fire cabinet by yourself requires careful planning, the right tools, and attention to detail that can make the difference between code compliance and potential hazards.
Before diving into wall anchors and level bubbles, preparation becomes your most valuable tool. Start by identifying the optimal location—ideally in a visible, accessible area that meets local fire codes while allowing quick access during emergencies. The installation height typically ranges between 4-5 feet from the floor to the cabinet’s center, making it accessible to most adults without stretching or bending.
Preparing Your Installation Site
The foundation of successful fire cabinet installation begins with meticulous measurement. Using a stud finder, locate and mark wall studs—these will provide the structural support necessary for your cabinet. For heavier cabinets (those exceeding 25 pounds), mounting directly into studs becomes non-negotiable.
Measure twice, drill once. This carpenter’s wisdom applies perfectly here. Create a paper template matching your cabinet’s mounting holes, then tape it to the wall at your desired height. Use a level to ensure perfect horizontal alignment before marking drill points through the template.
Different wall materials demand different approaches:
Mounting Techniques by Wall Type
| Wall Material | Recommended Hardware | Pre-Drilling Requirements |
|---|---|---|
| Drywall | Toggle bolts or molly bolts | 1/2″ hole for standard toggles |
| Concrete | Concrete anchors or Tapcon screws | Masonry bit matching anchor size |
| Brick | Lead anchors or sleeve anchors | Hammer drill with masonry bit |
For drywall installations without available studs, toggle bolts provide superior holding power. These clever devices expand behind the drywall, distributing the weight across a wider area. For concrete or brick walls, a hammer drill becomes essential—standard drills simply can’t penetrate these dense materials effectively.
Achieving Perfect Leveling
Nothing screams “amateur installation” louder than a crooked fire cabinet. Beyond aesthetics, proper leveling ensures the cabinet door operates correctly and internal components remain accessible.
The difference between a professional installation and a DIY project often comes down to the final 10% of effort—taking time to ensure perfect leveling and secure mounting.
For perfect leveling, use a 4-foot level across the top of the cabinet once it’s temporarily positioned. Make micro-adjustments before marking final drill positions. Some professional installers recommend:
- Pre-installing the top screws loosely
- Using the level to adjust the cabinet position
- Marking lower mounting holes only after confirming level position
- Completing the installation with remaining fasteners
Securing for Stability and Safety
The final phase involves properly tightening all mounting hardware. This step requires balance—overtightening can damage wall materials or warp the cabinet, while undertightening creates wobble and potential failure points.
For metal cabinets on drywall, consider using rubber washers between the cabinet and wall to prevent metal-on-metal contact that could eventually loosen the installation. In high-traffic areas, additional securing methods like construction adhesive along the cabinet back can provide supplemental support.
Test the installation by gently pulling on the opened cabinet door. Any movement indicates insufficient mounting that requires immediate attention. Remember that fire cabinets must withstand the stress of emergency use—when someone urgently needs access, the last thing you want is a cabinet pulling away from the wall.
With these techniques mastered, your fire cabinet installation will provide both the safety compliance and peace of mind that comes from knowing critical emergency equipment remains secure and accessible exactly when needed.
Bringing Your Fire Cabinet to Life
Testing for Flawless Operation
Once your fire cabinet is mounted securely to the wall, you’re not quite finished. The real magic happens in these final steps that transform a metal box into a life-saving station. Start by testing the door functionality—open and close it multiple times to ensure smooth operation without catching or sticking. The door should swing freely but close firmly with minimal effort.
Pay special attention to the lock mechanism. Whether you’re working with a key lock, break-glass emergency access, or a combination lock system, test it thoroughly from both locked and unlocked positions. Remember that in an emergency, seconds count—a stubborn lock could be catastrophic.
A properly functioning fire cabinet door should open with one fluid motion, even under stress conditions.
Stocking Your Cabinet Strategically
Your fire cabinet is only as effective as what you put inside it. Stock it according to both regulatory requirements and the specific needs of your space:
| Essential Equipment | Recommended Specifications | Replacement Interval |
|---|---|---|
| Fire Extinguisher | Class ABC, minimum 5lb capacity | Inspect annually, replace every 12 years |
| Fire Blanket | Fiberglass, minimum 4’×4’ | Replace every 5 years |
| Emergency Flashlight | Waterproof LED, minimum 300 lumens | Test monthly, replace batteries annually |
| First Aid Kit | OSHA-compliant for workplace size | Restock used items immediately, replace expired items |
Position items so the most frequently needed equipment is most accessible. The fire extinguisher should be placed for quick removal—typically at the front center of the cabinet. Ensure all safety pins and seals remain intact during installation.
Maintenance for Longevity
A fire cabinet installation isn’t a “set it and forget it” situation. Implement these maintenance practices to ensure your fire safety equipment remains ready for action:
-
Monthly visual inspections: Check pressure gauges on extinguishers, verify seals are intact, and ensure the cabinet remains free from obstruction.
-
Quarterly hardware check: Test hinges, locks, and door seals for proper function. Apply a silicone-based lubricant to hinges if they begin to squeak.
-
Biannual deep cleaning: Remove all contents, clean the interior with a non-abrasive cleaner, and check for any signs of moisture or corrosion.
The most common reason fire cabinets fail during emergencies isn’t poor installation—it’s neglected maintenance.
Document all maintenance activities in a log kept near (but not inside) the cabinet. This creates accountability and provides a record for insurance or inspection purposes.
For cabinets installed in harsh environments, consider applying a protective coating of marine-grade silicone sealant to the edges where the cabinet meets the wall. This prevents moisture infiltration that can lead to rust and deterioration.
Finally, clearly mark the cabinet location on your building’s emergency plan, and ensure all building occupants know its location. The most perfectly installed fire cabinet becomes useless if people don’t know where to find it when seconds matter.
Learn how to properly install a fire cabinet by yourself with our comprehensive DIY guide. Discover essential mounting techniques for different wall types, safety compliance requirements, and proper maintenance tips to enhance your home or business fire safety.
Learn how to properly install a fire cabinet by yourself with our comprehensive DIY guide. Discover essential mounting techniques for different wall types, safety compliance requirements, and proper maintenance tips to enhance your home or business fire safety.