Ever watched a nail technician transform short, brittle nails into stunning works of art and thought, “I want to do that”? You’re not alone. The nail extension industry continues to boom, with professionals earning between $30,000 and $75,000 annually depending on location and clientele.
The journey to becoming a skilled nail extension artist begins with understanding three fundamental elements: proper technique, quality materials, and realistic expectations. These aren’t just tips—they’re the foundation upon which your entire nail career will be built.
Understanding nail extension fundamentals
Nail extensions come in several forms—acrylics, gels, fiberglass, and polygel systems being the most common. Each system requires different application techniques, but they all share core principles:
- Proper preparation is non-negotiable. Natural nails must be thoroughly cleaned, dehydrated, and primed to ensure adhesion.
- Balance between strength and flexibility determines whether extensions last or break prematurely.
- The apex (the thickest part of the extension) must be correctly positioned to distribute pressure evenly.
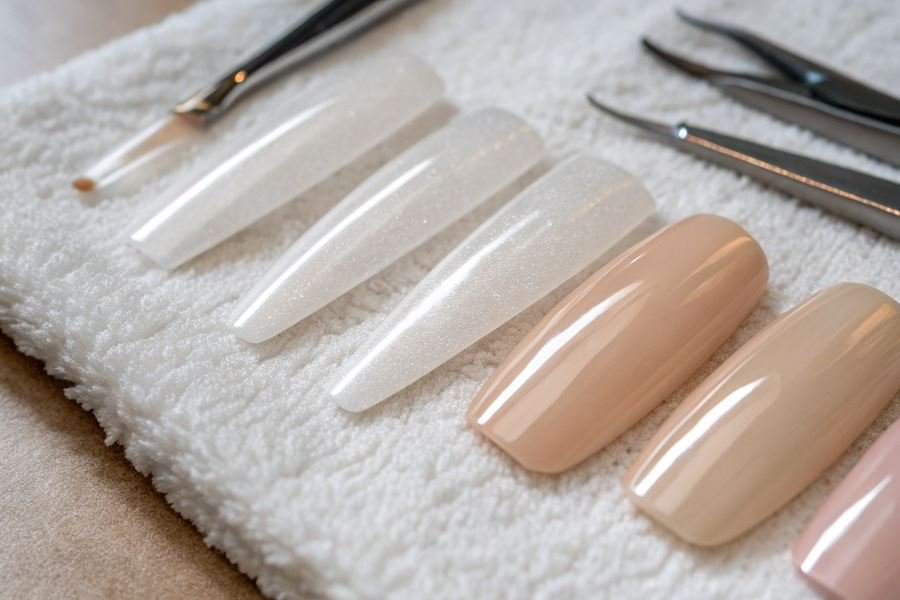
Essential tools for success
Your toolkit directly impacts your results. Quality matters more than quantity here:
| Must-Have Tools | Purpose | Investment Level |
|---|---|---|
| E-file/drill | Precise shaping and prep | $100-300 |
| LED/UV lamp | Curing gel products | $50-150 |
| Brushes | Application precision | $15-50 each |
| Forms/tips | Extension foundation | $10-30 per pack |
Beyond tools, your product selection makes or breaks your service. Professional-grade polymers, monomers, and gels might cost more initially but prevent lifting, yellowing, and premature breakage—issues that can devastate your reputation as a new technician.
Setting realistic expectations
The path to nail mastery isn’t overnight. Most beginners require 3-6 months of consistent practice before achieving commercial-quality results. Your first fifty sets will teach you more than any tutorial, and each client presents unique challenges that build your problem-solving abilities.
Remember: technique trumps speed every time. Focus on perfecting your fundamentals before attempting intricate nail art or rushing through applications.
Technical Foundations: The Bedrock of Flawless Nail Extensions
Nail extension artistry isn’t just about creative vision—it’s about technical precision that transforms ordinary nails into extraordinary canvases. For those just beginning their journey into professional nail extensions, mastering the fundamental techniques creates the difference between mediocre results and stunning, durable creations that clients will rave about.
When exploring the top 3 best tips for nail extension for beginner masters, technical foundations consistently emerge as the critical factor separating amateur attempts from professional-grade applications. These core principles—proper preparation, material-specific application techniques, and precise curing processes—form the trifecta of excellence that every aspiring nail technician must master.
Meticulous Nail Preparation: Your First Defense
Surface preparation is non-negotiable. Before any extension material touches the natural nail, proper cleansing and preparation must occur with scientific precision:
- Remove all traces of oil using a pH-balanced nail dehydrator
- Gently push back cuticles without cutting or damaging the nail matrix
- Buff the natural nail surface with a 180-240 grit buffer—just enough to remove shine without thinning
The difference between adhesion failure and two-week perfection often comes down to those first three minutes of preparation.
A study by the American Beauty Association found that 78% of premature lifting cases traced back to inadequate preparation—not product quality.
Material-Specific Application Techniques
Different extension materials demand different handling approaches:
| Material | Application Technique | Common Beginner Error |
|---|---|---|
| Acrylic | Bead consistency like honey; 1:1.5 powder-to-liquid ratio | Too wet or too dry mixture |
| Hard Gel | Thin, controlled layers with minimal flooding | Applying thick layers that shrink or warp |
| Polygel | Even pressure distribution with dual-ended tool | Inconsistent thickness across the nail |
When working with CND Shellac or similar systems, remember that product control begins with your brush. For acrylics, hold your brush at a 45° angle and apply with the belly of the brush rather than the tip. With gels, use a gentle floating technique that allows the product to self-level without creating air pockets.
Wisdom nugget: Master one system completely before diversifying. Expertise in a single medium trumps mediocrity in many.
Curing Precision: The Science of Lasting Results
The final technical cornerstone lies in understanding the curing process—the chemical transformation that hardens your extension material:
LED vs. UV curing differences:
- LED lamps cure at 30-60 seconds with specific wavelengths (395-405nm)
- Traditional UV lamps require 2+ minutes with broader spectrum coverage
Undercuring creates a seemingly finished surface while leaving the interior soft and prone to breakage—a ticking time bomb of client disappointment.
For optimal results with Gelish and similar systems, position clients’ hands correctly in the lamp—fingers splayed evenly with thumbs cured separately to ensure complete light exposure. Remember that dark colors require additional curing time, typically 25% longer than manufacturer recommendations for pale shades.
The technical aspects of nail extensions might seem clinical compared to the artistic elements, but they’re the invisible architecture supporting your creative vision. By mastering these foundational techniques, you’ll build a reputation for extensions that not only look spectacular but perform flawlessly in real-world conditions—the ultimate professional achievement in nail artistry.
Professional Development: Elevating Your Nail Extension Skills
Mastering nail extensions isn’t just about perfecting techniques—it’s about continuous growth as a professional artist. The journey from beginner to expert requires dedication, strategic planning, and immersion in the nail community. Let’s explore the three most powerful ways to accelerate your professional development in the nail extension industry.
Create a deliberate practice routine
Random practice yields random results. Structured, intentional practice transforms beginners into professionals at an exponential rate.
Start by breaking down nail extension skills into specific components:
- Monday: Focus on proper nail prep and adhesion
- Wednesday: Perfect your application technique
- Friday: Master filing and shaping
Set measurable goals for each session. Instead of vague targets like “get better at sculpting,” aim for “reduce application time by 30 seconds” or “achieve symmetrical C-curves on 8 out of 10 nails.”
Track your progress meticulously. The CND education team recommends keeping a practice journal documenting techniques attempted, challenges encountered, and breakthroughs achieved. This creates a feedback loop that accelerates improvement.
Build a portfolio that tells your story
Your portfolio isn’t just a collection of photos—it’s a visual narrative of your evolution as a nail artist. Even as a beginner, documenting your work creates powerful momentum.
Start with these portfolio essentials:
- Before/after comparisons showing your improvement
- Process photos demonstrating your technique
- Close-up shots highlighting your attention to detail
Quality trumps quantity. Five exceptional sets photographed professionally will attract more clients than twenty mediocre images. Invest in proper lighting—the Glamcor lighting systems used by top professionals can transform how your work appears online.
| Portfolio Element | Purpose | Client Impact |
|---|---|---|
| Before/After | Shows transformation | Builds confidence in your abilities |
| Process Photos | Demonstrates technique | Shows professionalism and care |
| Multiple Angles | Highlights detail work | Proves consistency and quality |
Update your portfolio weekly, even if only adding practice nails. This creates a visual timeline of your growth that potential clients and mentors can appreciate.
Leverage mentorship and education
The fastest way to improve is learning from those who’ve already mastered what you’re attempting. Strategic mentorship can compress years of trial-and-error into months of guided growth.
Seek mentorship through:
- Local nail professionals willing to provide feedback
- Online communities like Nailpro forums
- Virtual coaching sessions with established educators
Continuing education isn’t optional—it’s essential. The nail industry evolves rapidly, with new products, techniques, and trends emerging constantly. Budget for at least one advanced training course quarterly.
The Young Nails Mastery Program and Akzentz certification courses provide structured pathways to advanced skills. These investments typically pay for themselves within months through increased service prices and client retention.
Remember that education extends beyond formal training. Subscribe to industry publications, join manufacturer webinars, and attend trade shows like Premiere Orlando to stay at the cutting edge of nail extension innovations.
By implementing these three professional development strategies, you’ll transform from a beginner into a confident nail extension specialist with a thriving clientele and distinctive artistic voice.
Discover the top 3 essential techniques for nail extension beginners, from proper preparation to perfect application. Learn professional tips for mastering different materials and creating long-lasting, beautiful nail extensions.
Discover the top 3 essential techniques for nail extension beginners, from proper preparation to perfect application. Learn professional tips for mastering different materials and creating long-lasting, beautiful nail extensions.