Ever watched a sliding gate glide open with perfect precision and wondered, “How hard could it be to install that system myself?” The answer might surprise you. With the right knowledge and tools, transforming your property entrance from manual to automated isn’t just possible—it’s a project that delivers satisfaction and security for years to come.
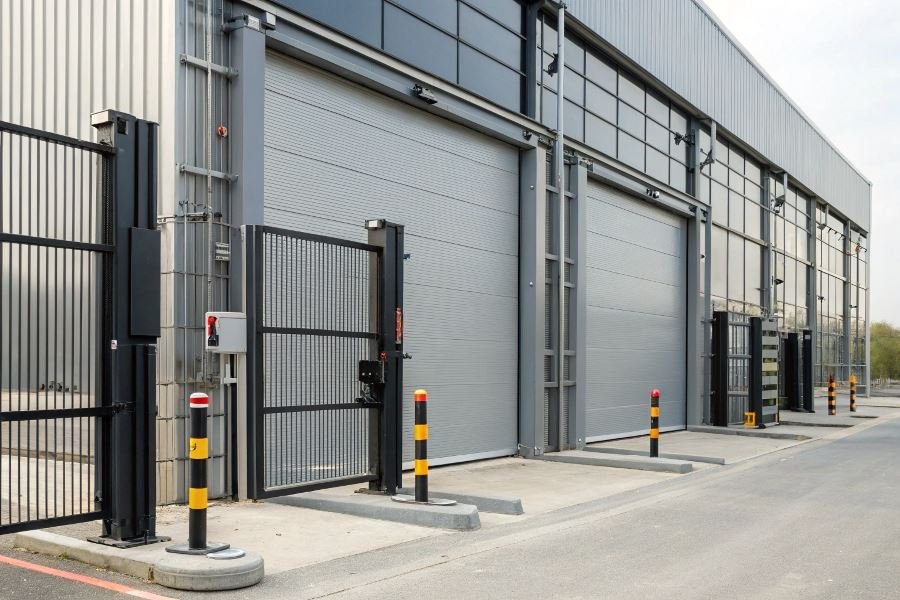
Sliding gate automation systems consist of several critical components working in harmony. At the heart lies the motor unit—the powerhouse that generates movement. This connects to a control board (the system’s brain), safety sensors that prevent accidents, and remote controllers for convenient operation. The rack and pinion mechanism translates the motor’s power into smooth lateral movement, while limit switches ensure your gate stops precisely where it should.
Why proper installation matters more than you think
A correctly installed sliding gate automation system delivers benefits far beyond convenience. Property owners report up to 15% increases in property valuation after professional gate automation installation. More importantly, proper installation ensures optimal safety performance—preventing potential accidents that poorly installed systems might allow.
The installation process follows a logical sequence: preparing the foundation, mounting the motor unit, attaching the rack to your gate, connecting the control system, calibrating limit switches, and finally, programming your remote controls. You’ll need basic tools like a drill, wrench set, level, and measuring tape, plus specialized items including a multimeter and wire strippers.
Remember: The difference between a gate that operates flawlessly for a decade and one that fails within months often comes down to installation precision.
Mastering the Pre-Installation Phase for Gate Automation
Site Assessment: The Foundation of Success
Before diving into the technical aspects of sliding gate automation, a thorough site assessment is non-negotiable. Professional installers begin by measuring the gate’s width, height, and most critically—its weight. A residential driveway gate typically weighs between 300-800 pounds, while commercial applications can exceed 2,000 pounds. The track length must extend beyond the gate’s width by at least 3-4 feet to accommodate full retraction.
The terrain plays a crucial role when planning how to properly install automation for sliding gates. Slopes exceeding 5 degrees require specialized operators, while uneven surfaces demand additional groundwork. Document the gate’s travel path, checking for obstacles like rocks, drainage issues, or vegetation that might interfere with movement. Measure twice, purchase once—this mantra has saved countless professionals from costly mistakes.
Electrical Requirements: Powering Your System Safely
The electrical infrastructure demands meticulous planning. Most residential sliding gate operators require a dedicated 120V circuit with 15-20 amp capacity. Commercial systems often need 220V service. The power source should be within 50 feet of the operator location, though high-quality LiftMaster and Nice systems can accommodate longer runs with proper wire gauge adjustments.
Safety considerations are non-negotiable. The National Electrical Code requires:
- GFCI protection for all outdoor electrical connections
- Proper grounding with copper rods driven at least 8 feet into soil
- Weatherproof junction boxes rated for outdoor use
- Conduit protection for all underground wiring (minimum 18 inches deep)
Never compromise on electrical safety standards—they protect both your investment and the people who interact with your gate.
Selecting the Right Automation System
The perfect automation system balances gate specifications with usage patterns. Consider this decision matrix:
| Gate Weight | Usage Frequency | Recommended Drive Type | Example Models |
|---|---|---|---|
| <500 lbs | Low (<20/day) | Chain drive | Ghost Controls AXSO |
| 500-1000 lbs | Medium (20-50/day) | Rack and pinion | BFT Deimos Ultra |
| 1000 lbs | High (50+/day) | Hydraulic | FAAC 844 |
The climate in your region significantly impacts system selection. In areas with heavy snowfall, choose operators with 30% more power than your gate’s minimum requirements. For coastal regions, marine-grade DoorKing systems offer superior corrosion resistance.
Connectivity and Control Planning
Modern gate automation extends beyond basic operation. Plan your control ecosystem in advance:
- Entry methods (keypads, card readers, smartphone access)
- Integration with existing home automation systems
- Video monitoring requirements
- Backup power solutions for outages
Remember: The pre-installation phase determines 80% of your automation system’s long-term reliability. Rushing through planning virtually guarantees expensive corrections later.
By investing time in comprehensive site assessment, electrical preparation, and thoughtful system selection, you’re not just installing gate automation—you’re building a foundation for years of trouble-free operation.
Mastering Sliding Gate Automation Installation
Foundation: The Bedrock of Gate Reliability
The journey to automated gate perfection begins with proper foundation work. A solid concrete base isn’t just recommended—it’s essential for long-term performance. For standard residential sliding gates, prepare a foundation at least 16 inches deep and 24 inches square, using concrete with a minimum strength of 3,000 PSI.
The mounting plate installation requires precision that pays dividends for years. Position your mounting plate while the concrete is still wet, using a level to ensure perfect horizontal alignment. Allow a full 72 hours for curing before mounting any equipment—this patience prevents future shifting that could damage your motor unit.
The quality of your foundation determines the lifespan of your entire automation system. Cut corners here, and you’ll pay twice later.
For areas with freeze-thaw cycles, consider installing drainage beneath your foundation to prevent water accumulation. A simple 4-inch gravel bed beneath the concrete can dramatically extend your system’s lifespan.
Motor Positioning and Rack Installation
The motor unit—your system’s heart—demands strategic positioning. Mount it parallel to the gate’s travel path, maintaining a consistent 1/4 to 1/2 inch clearance between the drive gear and rack. This small gap prevents excessive wear while ensuring positive engagement.
When installing the rack:
- Temporarily mount the first section using clamps
- Check alignment with the drive gear
- Mark mounting holes precisely
- Pre-drill holes to prevent splitting
- Secure with appropriate fasteners (stainless steel recommended)
Continue this process section by section, checking alignment at each junction.
For heavier gates exceeding 1,000 pounds, consider using welded steel rack instead of nylon or aluminum alternatives. The additional strength prevents deformation under load.
Programming Your Gate’s Intelligence
Modern gate operators like the LiftMaster SL585 or FAAC 740 feature intuitive programming interfaces, but proper setup requires attention to detail.
Begin with basic travel limits:
| Programming Step | Purpose | Common Mistake |
|---|---|---|
| Open limit | Defines fully open position | Setting too wide, causing motor strain |
| Close limit | Defines fully closed position | Setting too tight, causing pressure damage |
| Force adjustment | Controls obstacle detection | Setting too high, compromising safety |
| Auto-close timing | Sets delay before automatic closing | Setting too short for safe passage |
After initial programming, conduct comprehensive testing. Run the gate through at least 10 complete cycles, observing for:
- Smooth, consistent movement
- Proper stopping at limit positions
- Effective obstacle detection
- Appropriate response to safety devices
Troubleshooting tip: If your gate hesitates during travel, check rack alignment rather than immediately adjusting motor power settings. Mechanical issues often masquerade as electrical problems.
For optimal performance in extreme weather, consider installing a heater kit for northern climates or additional cooling for southern regions. These small investments prevent the frustration of seasonal malfunctions.
Remember that proper installation isn’t just about convenience—it’s about safety. Always verify that your photocell sensors, pressure sensitivity, and emergency release mechanisms function flawlessly before considering your installation complete.
Learn how to properly install sliding gate automation with our expert DIY guide. From component selection to foundation work, motor positioning, and final programming—master professional installation techniques for reliable, secure automated gates.
Learn how to properly install sliding gate automation with our expert DIY guide. From component selection to foundation work, motor positioning, and final programming—master professional installation techniques for reliable, secure automated gates.