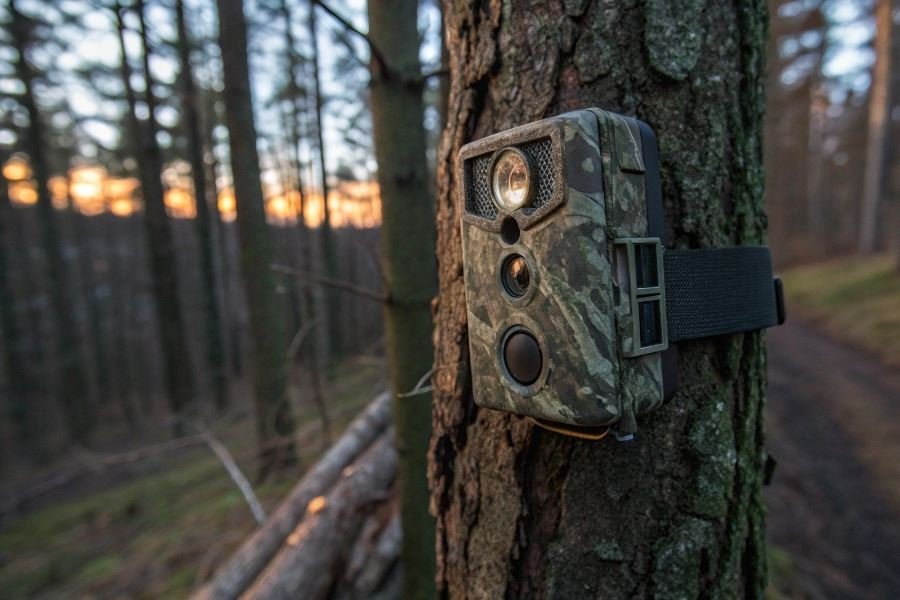

Ever stood in a forest at dawn, hoping to glimpse that elusive fox or mountain lion? Camera traps transform this fleeting hope into documented reality, capturing wildlife moments you’d otherwise miss. These unobtrusive sentinels work tirelessly while you sleep, revealing the secret lives of animals that actively avoid human presence.
Camera traps have revolutionized wildlife research since their mainstream adoption in the early 2000s. These motion-triggered devices provide unprecedented insights into animal behavior, population dynamics, and habitat use without the distorting influence of human observers. For conservationists, researchers, and wildlife enthusiasts alike, properly deployed camera traps deliver invaluable data that simply cannot be gathered any other way.
Essential gear for successful deployment
Your camera trap arsenal should include:
- Primary equipment: High-quality camera trap (with infrared capability for night shots), secure mounting hardware, and weather-resistant housing
- Support tools: GPS device, compass, field notebook, and durable batteries
- Deployment aids: Machete or pruning shears, survey tape, and scent elimination products
The planning imperative
Successful camera trap deployment hinges on thoughtful preparation. Before heading into the field, you’ll need to:
- Define clear objectives – Are you monitoring a specific species, documenting biodiversity, or tracking seasonal movements?
- Research target species – Understanding movement patterns and habitat preferences dramatically increases capture rates
- Scout locations strategically – Identify game trails, water sources, and natural funnels where wildlife naturally congregates
Remember that a well-planned camera trap setup not only captures more images but also yields higher quality data that can transform your understanding of the natural world.
Strategic Placement for Wildlife Camera Success
The difference between capturing stunning wildlife footage and an empty memory card often comes down to strategic placement. Mastering camera trap positioning requires understanding animal behavior, environmental conditions, and technical considerations that many enthusiasts overlook.
When setting up a camera trap for maximum efficiency, location selection becomes your most critical decision. Wildlife doesn’t move randomly—animals follow established patterns tied to resources, safety, and seasonal behaviors. The most productive camera trap sites typically fall into three categories: travel corridors, resource hubs, and transition zones. Game trails, particularly those at natural bottlenecks like fallen logs or stream crossings, consistently deliver higher capture rates than random forest placements. Research from the Wildlife Conservation Society shows that camera traps positioned at habitat intersections—where forest meets meadow, for instance—can increase capture rates by up to 40%.
Height, Angle and Orientation Mastery
The technical aspects of mounting deserve careful attention. For most North American mammals:
| Animal Type | Optimal Height | Angle Consideration |
|---|---|---|
| Deer/Elk | 3-4 feet | Slight downward tilt |
| Small mammals | 12-18 inches | Parallel to ground |
| Bears | 4-5 feet | Sturdy mounting essential |
Mount your Browning Trail Cameras or other brands on stable trees or posts that won’t sway in wind. The camera should face north or south whenever possible to prevent direct sunlight interference during sunrise and sunset—prime wildlife activity periods. This orientation prevents backlit subjects and false triggers from changing light conditions.
Environmental Factors That Make or Break Results
Environmental conditions dramatically impact camera trap performance. Consider these critical factors:
Lighting dynamics determine image quality. Avoid pointing cameras toward sunrise/sunset positions. In dense forest, select slightly more open areas that allow enough light for clear images without requiring constant flash activation.
Seasonal vegetation changes can transform a perfect summer setup into a useless winter position. Anticipate how falling leaves, growing underbrush, or snow accumulation might affect your field of view and trigger zone.
Weather resilience matters for long-term deployments. Position cameras under natural cover when possible to protect from direct rain and snow. For exposed locations, consider aftermarket shields or weatherproof housing for additional protection.
Temperature extremes affect battery life and sensor performance. In cold environments, lithium batteries outperform alkaline options by maintaining consistent power output down to -40°F. Some premium models like the Reconyx HyperFire 2 include temperature compensation technology that adjusts sensor sensitivity based on ambient conditions.
The most successful wildlife photographers understand that strategic placement isn’t just about finding animals—it’s about creating the optimal conditions for capturing them clearly. By combining knowledge of animal behavior with technical expertise and environmental awareness, you’ll transform your camera trapping from random luck to consistent success.
Remember that patience remains essential. Even perfectly placed camera traps sometimes require weeks to deliver results as animals adjust to subtle habitat changes. Document your setups, track results, and refine your approach with each deployment to build a comprehensive understanding of your local wildlife patterns.
Mastering Camera Trap Settings for Field Success
Camera traps transform wildlife research and monitoring when properly configured. The difference between capturing that elusive mountain lion or missing it entirely often comes down to your settings optimization and maintenance discipline.
Dialing in the perfect trigger sensitivity
The trigger sensitivity setting might be the most critical configuration on your camera trap. Too sensitive, and you’ll return to find 2,000 photos of waving grass. Too conservative, and that rare species will walk by unrecorded.
Start with medium sensitivity in most environments, then adjust based on your first test results. For smaller wildlife, increase sensitivity incrementally. For larger mammals in open areas, you can often dial it back.
Temperature affects trigger performance dramatically. Many premium models like the Reconyx HyperFire 2 include temperature compensation technology that automatically adjusts sensitivity as conditions change.
Capture modes deserve strategic consideration:
| Mode | Best For | Battery Impact |
|---|---|---|
| Photo | General surveys, species ID | Low |
| Burst (3-5 photos) | Behavior documentation | Medium |
| Video (10-30 sec) | Interaction studies | High |
| Hybrid (photo+video) | Comprehensive data | Very High |
The ideal timing interval depends entirely on your research question. For population surveys, longer intervals (2-5 minutes) prevent duplicate counts. For behavior studies, shorter intervals (30 seconds or less) ensure you don’t miss crucial interactions.
Power management that goes the distance
Battery selection represents the difference between a successful six-month deployment and a failed study. Lithium batteries outperform alkaline in nearly every scenario, particularly in temperature extremes.
Energizer Ultimate Lithium batteries consistently deliver superior performance in field tests, maintaining voltage levels even in sub-freezing conditions where alkaline batteries quickly fail.
For extended deployments, consider these power-extending strategies:
- Reduce video duration to 10 seconds maximum
- Implement longer delay intervals between triggers
- Disable features like GPS tagging when unnecessary
- Use external battery packs for critical deployments
- Consider solar panel attachments for suitable locations
The most sophisticated camera settings mean nothing if your unit dies after two weeks in the field.
Maintenance rhythms that prevent failures
Develop a pre-deployment checklist that includes:
- Testing all functions in controlled conditions
- Formatting memory cards in-camera (never on computer)
- Applying silica gel packets inside the housing
- Checking and replacing lid gaskets
- Applying dielectric grease to battery terminals
When troubleshooting field issues, the most common problems have straightforward solutions:
False triggers: Clear vegetation in the detection zone or adjust camera angle slightly downward.
Missed detections: Check battery voltage first, then verify your detection zone isn’t set too narrowly.
Condensation issues: Add additional desiccant or consider aftermarket weather shields from Camlockbox.
Memory card errors: Always carry spare, pre-formatted cards and never remove cards without powering down first.
Establish a quarterly maintenance schedule even for cameras performing well. Preventative care dramatically extends equipment life and ensures consistent data collection across your study period.
With these optimizations, your camera traps will deliver reliable performance and capture those critical wildlife moments that justify all your careful preparation.
Learn expert techniques for setting up wildlife camera traps with optimal placement, settings, and maintenance. Maximize your monitoring efficiency with proper positioning, power management, and environmental considerations for consistent results.
Learn expert techniques for setting up wildlife camera traps with optimal placement, settings, and maintenance. Maximize your monitoring efficiency with proper positioning, power management, and environmental considerations for consistent results.