
Ever wondered what happens to those metal tools between clients at your favorite salon? Behind every pristine manicure and flawless facial lies an unsung hero: the ultrasonic sterilizer. This technology isn’t just a fancy gadget—it’s the frontline defense protecting clients from cross-contamination and infection.
Ultrasonic sterilizers work through a fascinating process called cavitation. When activated, these devices generate high-frequency sound waves (typically 20-400 kHz) that create microscopic bubbles in the cleaning solution. These bubbles implode with tremendous force, creating tiny “scrubbing bubbles” that reach into the smallest crevices of tools—places traditional cleaning methods simply can’t touch.
The science behind the sparkle
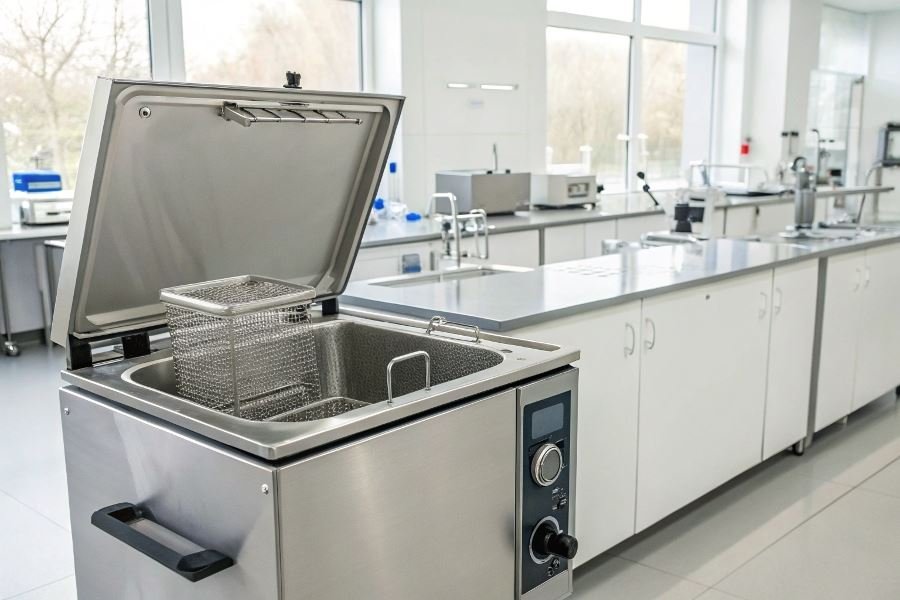
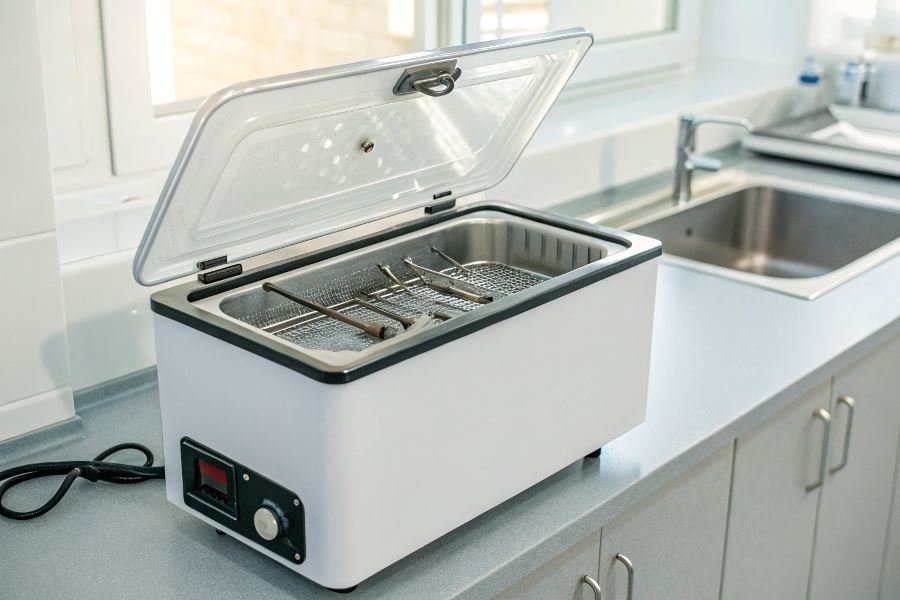
At its core, an ultrasonic sterilizer consists of a stainless steel tank filled with cleaning solution, transducers that generate ultrasonic waves, and a heating element. The combination of ultrasonic energy, heat, and specialized cleaning solutions creates a powerful three-pronged approach to eliminating pathogens.
“Proper sterilization isn’t just about meeting regulations—it’s about building trust. When clients see your commitment to safety, they become customers for life.”
Why proper sterilization matters more than ever
The stakes in beauty environments are surprisingly high. Even minor procedures can create microscopic skin breaks, potentially exposing clients to bacteria, fungi, and viruses. Professional-grade ultrasonic sterilizers eliminate up to 99.9% of harmful microorganisms—a standard that manual cleaning simply cannot achieve consistently.
Choosing your sterilization partner
Beauty professionals typically encounter three main categories:
- Tabletop units (1-3 liters): Perfect for small tools like cuticle nippers and tweezers
- Mid-sized units (3-6 liters): Ideal for medium-sized implements and multiple tools simultaneously
- Industrial models (6+ liters): For high-volume salons handling dozens of implements hourly
The right ultrasonic sterilizer doesn’t just protect clients—it protects your reputation and business longevity in an industry where safety standards continue to rise year after year.
Mastering Ultrasonic Sterilization: The Complete Guide
The foundation of client safety in any beauty salon rests on proper sterilization protocols. Ultrasonic sterilizers have revolutionized how beauty professionals maintain their tools, offering deeper cleaning than traditional methods by using high-frequency sound waves to create microscopic bubbles that implode and remove contaminants. Learning how to properly use an ultrasonic sterilizer in a beauty salon isn’t just about compliance—it’s about building client trust and protecting your reputation.
Preparing Tools for Sterilization Success
Pre-sterilization is non-negotiable. Before your tools touch the ultrasonic bath, they require proper preparation:
- Remove all visible debris using a brush or cloth
- Disassemble multi-part tools completely
- Rinse thoroughly under running water
- Pre-soak heavily soiled items in enzymatic cleaner for 5-10 minutes
Never skip pre-cleaning—ultrasonic sterilizers remove microscopic contaminants but aren’t designed to handle visible debris.
A study by the American Journal of Infection Control found that proper pre-cleaning can increase sterilization effectiveness by up to 60%. This isn’t just about cleanliness—it’s about extending the life of your expensive tools.
Loading and Operating Your Ultrasonic Unit
The effectiveness of your Tuttnauer or Midmark ultrasonic sterilizer depends largely on proper loading techniques:
- Fill the tank with distilled water to the indicated fill line
- Add appropriate ultrasonic solution according to manufacturer specifications (typically 1-2 oz per gallon)
- Place items in sterilization basket—never directly on tank bottom
- Ensure items don’t touch each other or overlap
- Fully submerge all items
- Secure lid before activating
Critical mistake to avoid: Overloading the chamber reduces cleaning effectiveness by up to 40%.
Timing and Temperature Matrix
Different tools require different sterilization parameters:
| Tool Type | Temperature | Duration | Solution Type |
|---|---|---|---|
| Metal implements | 140°F (60°C) | 10-15 min | General purpose |
| Nail tools | 140°F (60°C) | 15-20 min | Disinfectant |
| Delicate tools | 120°F (49°C) | 5-10 min | Gentle formula |
| Glass/ceramics | 140°F (60°C) | 10-15 min | General purpose |
Temperature precision matters. Studies show that ultrasonic cleaning at 140°F (60°C) eliminates 99.9% of common pathogens, while dropping to 120°F (49°C) reduces effectiveness to 95%.
Post-Sterilization Protocols
The sterilization process doesn’t end when the cycle completes. Proper handling afterward is equally crucial:
- Use sterilized tongs to remove items from the bath
- Rinse thoroughly with distilled water to remove chemical residue
- Dry completely using lint-free towels or a heat dryer
- Inspect each item under magnification for remaining debris
- Package in sterilization pouches from Crosstex or similar providers
- Label with sterilization date and operator initials
- Store in closed, dust-free cabinets
Storage wisdom: Properly packaged sterile items maintain their sterility for up to 12 months when stored correctly in sealed pouches.
Remember that documentation is your legal protection. Maintain detailed logs of each sterilization cycle, including dates, times, and the specific items processed. This meticulous approach not only ensures client safety but also demonstrates your commitment to professional excellence.
Mastering Ultrasonic Sterilizer Maintenance for Salon Success
The maintenance rhythm that professionals follow
Ultrasonic sterilizers represent a significant investment in your salon’s safety protocol—and like any precision equipment, they demand consistent care. The most successful salon owners follow a structured maintenance schedule that preserves both the equipment’s lifespan and sterilization efficacy.
Daily maintenance forms your first line of defense. After each day’s operations, drain the tank completely and wipe down interior surfaces with a non-abrasive cloth. This prevents mineral buildup that can reduce ultrasonic wave transmission by up to 30% according to equipment manufacturers.
Weekly deep cleaning becomes your secret weapon. Set aside 30 minutes each week to run a cleaning cycle with a specialized ultrasonic cleaner solution like Branson EC. This dissolves stubborn residues that regular cleaning might miss. Follow with a thorough rinse using distilled water—tap water introduces minerals that can damage heating elements over time.
Monthly inspection rituals separate professionals from amateurs. Check all gaskets, seals, and electrical connections for signs of wear. The ultrasonic transducers—those magical components generating the cleaning power—should be examined for any signs of pitting or damage. Document these inspections in a maintenance log to track performance patterns.
Troubleshooting the sterilization mysteries
Even meticulously maintained sterilizers occasionally present challenges. Recognizing these issues early prevents both equipment damage and sterilization failures.
Insufficient cleaning power typically stems from three culprits: depleted solution strength, improper temperature, or failing transducers. Test by placing aluminum foil in the tank during operation—uniform pitting indicates proper ultrasonic activity, while uneven patterns suggest transducer issues.
Temperature inconsistencies often signal heating element problems. Most professional-grade sterilizers operate optimally between 122°F-140°F (50°C-60°C). When temperatures drift outside this range, calibration may be necessary.
Unusual noises during operation demand immediate attention. Grinding or rattling sounds typically indicate loose components or foreign objects interfering with the transducers. Power down immediately to prevent cascade failures that could cost hundreds in repairs.
Persistent foaming in the tank usually indicates improper solution concentration or contamination from previous items. This reduces sterilization effectiveness by creating air pockets that shield microorganisms from ultrasonic waves.
The replacement timeline that protects your investment
Solutions and components have finite lifespans that directly impact sterilization effectiveness. Following industry-standard replacement schedules prevents both equipment failure and compromised client safety.
| Component | Replacement Frequency | Warning Signs |
|---|---|---|
| Cleaning solution | Every 8-10 hours of operation | Cloudy appearance, reduced cleaning effectiveness |
| Gaskets/seals | Every 6-12 months | Visible cracking, leakage around lid |
| Heating elements | Every 2-3 years | Inconsistent temperatures, longer heating times |
| Transducers | Every 3-5 years | Reduced cleaning power, uneven cleaning patterns |
The cleaning solution demands particular attention. Most manufacturers of professional solutions like BluWave Ultrasonics recommend replacement after 8-10 hours of active use. Using exhausted solutions creates a dangerous illusion of sterilization while potentially harboring contaminants.
Digital timers and control panels typically show early warning signs before complete failure. Erratic displays, unresponsive buttons, or inconsistent timing cycles indicate circuit board issues that should be addressed by certified technicians.
Remember that replacement parts should always meet manufacturer specifications. Aftermarket components might offer short-term savings but frequently lead to premature equipment failure and potentially compromised sterilization—a risk no reputable salon can afford to take.
Discover the complete guide to ultrasonic sterilizer usage in beauty salons. Learn proper preparation, operation techniques, maintenance tips, and troubleshooting for salon tools to ensure client safety and regulatory compliance.
Discover the complete guide to ultrasonic sterilizer usage in beauty salons. Learn proper preparation, operation techniques, maintenance tips, and troubleshooting for salon tools to ensure client safety and regulatory compliance.