Ever wondered why professional HVAC technicians treat refrigerant like liquid gold? It’s not just the price tag—though at 50−150 per pound depending on the type, it certainly commands respect. It’s because proper refrigerant handling sits at the intersection of system performance, personal safety, and environmental responsibility.
Refrigerant replacement isn’t just a maintenance task—it’s a critical procedure that demands precision and knowledge. When done correctly, it extends equipment life and maintains efficiency. When done poorly? You’re looking at potential system damage, personal injury, or even environmental violations that carry hefty penalties.
The environmental stakes are higher than you think
The refrigerants that leaked freely into the atmosphere decades ago have contributed significantly to ozone depletion. A single pound of R-22 (once commonly used) has the global warming potential equivalent to nearly two tons of carbon dioxide. This is precisely why the EPA established strict regulations governing refrigerant handling, with penalties reaching $37,500 per day for violations.
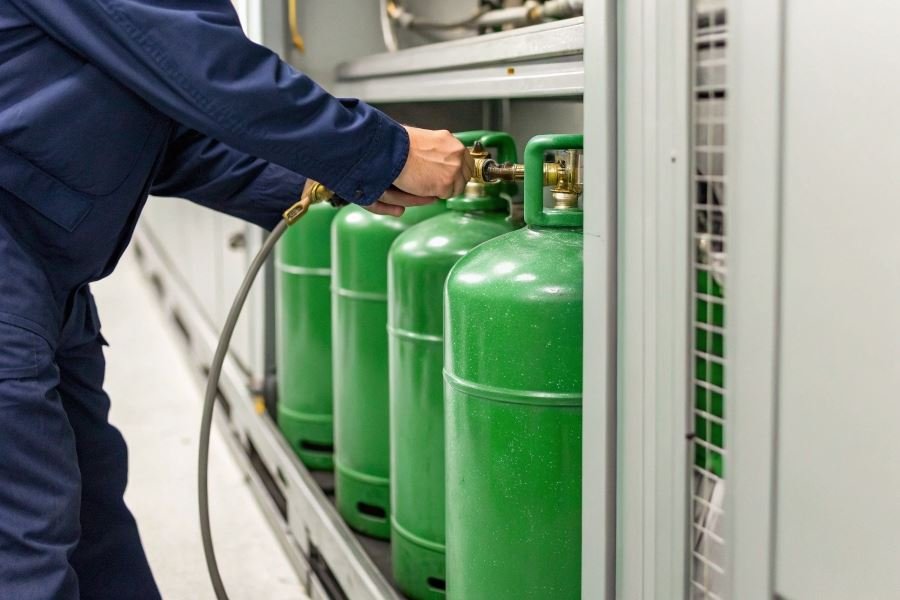
Essential tools for proper refrigerant service
Before attempting any refrigerant work, you’ll need specialized equipment:
- Recovery machine – Captures existing refrigerant without atmospheric release
- Vacuum pump – Removes moisture and air from the system
- Manifold gauge set – Monitors system pressures throughout the process
- Refrigerant scale – Ensures precise charging to manufacturer specifications
- Leak detector – Verifies system integrity before recharging
Remember that proper certification isn’t just legally required—it’s your assurance that you understand the complex chemistry and physics at play in these critical systems.
The Master’s Guide to Refrigerant Replacement
Refrigerant replacement isn’t just a maintenance task—it’s an art form that requires precision, patience, and the right tools. When done correctly, it extends equipment life, optimizes performance, and prevents those middle-of-summer cooling emergencies that no one wants to experience.
Understanding how to properly replace the refrigerant in a refrigeration system involves following a methodical process that professionals have refined over decades. This isn’t a job for the faint-hearted DIYer, but knowing the process helps you communicate better with technicians and ensures the job meets industry standards.
Preparing the System for Refrigerant Removal
First things first: proper preparation prevents poor performance. Before touching any component:
- Power down completely – Disconnect electrical power to avoid shock hazards and component damage
- Gather specialized tools – You’ll need a refrigerant recovery machine, vacuum pump, manifold gauge set, and appropriate refrigerant cylinders
- Identify the refrigerant type – Different systems use different refrigerants (R-410A, R-134a, etc.), and mixing types can cause catastrophic failure
Remember: EPA regulations require technicians to be certified to handle refrigerants. Uncertified handling carries penalties up to $37,500 per violation.
Recovering Existing Refrigerant Safely
The recovery process isn’t just environmentally mandated—it’s critical for system integrity:
- Connect the manifold gauges to the service ports (high and low sides)
- Attach the recovery machine using approved hoses
- Operate the recovery machine until it reaches the required vacuum level (typically 0 psig)
The recovery process captures approximately 95% of refrigerant when done correctly, preventing harmful atmospheric release and ozone depletion.
Evacuating the System and Leak Detection
This critical step removes moisture and non-condensables that would otherwise contaminate your new refrigerant:
- Connect the vacuum pump to the manifold gauge set
- Pull a deep vacuum (500 microns or less) and hold for at least 30 minutes
- Perform a standing vacuum test—if pressure rises, you have leaks
Leak detection methods include:
| Method | Pros | Cons |
|---|---|---|
| Electronic detector | Highly sensitive, precise | Expensive, requires calibration |
| UV dye | Visual confirmation | System must run before inspection |
| Soap solution | Inexpensive, immediate | Less sensitive, messy |
Charging with New Refrigerant
This is where precision matters most:
- Close all valves on the manifold gauge set
- Connect the refrigerant cylinder to the center port
- Purge the charging hose to eliminate air
- Open the low-side valve and add refrigerant slowly in liquid form (for most systems)
- Monitor system pressures constantly during charging
The exact charge amount must follow manufacturer specifications—overcharging is just as problematic as undercharging and can reduce efficiency by up to 30%.
Testing System Performance
The final verification ensures your work translates to real-world performance:
- Measure superheat and subcooling values (typically 8-12°F superheat and 10-15°F subcooling for many systems)
- Check operating pressures against manufacturer specifications
- Monitor amperage draw on compressor
- Verify temperature differential across evaporator (typically 15-20°F)
A properly charged system will maintain consistent temperatures, cycle normally, and operate at peak efficiency—potentially saving 10-15% on energy costs compared to an improperly charged system.
Remember that refrigerant replacement is both a technical procedure and an environmental responsibility. When done right, it ensures your cooling system will perform reliably through even the most demanding conditions.
Refrigerant Replacement Mastery: Beyond the Basics
Avoiding Critical Mistakes That Cost You
The difference between a successful refrigerant replacement and a costly disaster often comes down to subtle details. Professional HVAC technicians consistently report that improper system evacuation tops the list of refrigerant replacement failures. When technicians rush this crucial step, moisture and non-condensable gases remain in the system, leading to acid formation, compressor damage, and efficiency losses of up to 30%.
Another frequent misstep is incorrect refrigerant charging. The precision required here cannot be overstated—overcharging by even 10% can increase power consumption by 12% while reducing cooling capacity. Undercharging creates excessive compressor heat and premature wear.
“The most expensive refrigerant is the one you have to replace twice because you didn’t do it right the first time.”
Perhaps most dangerous is mixing incompatible refrigerants or oils. Modern refrigeration systems use specific refrigerant-oil combinations that aren’t interchangeable. For example, R-410A systems use POE (polyolester) oils that will fail catastrophically if mixed with mineral oils from older R-22 systems.
Certification Requirements You Cannot Ignore
The regulatory landscape for refrigerant handling isn’t just about compliance—it’s about environmental protection and safety. The EPA’s Section 608 certification is mandatory for anyone purchasing, handling, or working with refrigerants in stationary systems. This isn’t merely paperwork; violations can trigger penalties up to $37,500 per day.
The certification comes in four types:
| Certification Type | Covers | Required For |
|---|---|---|
| Type I | Small appliances | Domestic refrigerators, window AC units |
| Type II | High-pressure systems | Most commercial refrigeration |
| Type III | Low-pressure systems | Chillers with centrifugal compressors |
| Universal | All system types | Comprehensive coverage |
Beyond federal requirements, many states have implemented additional licensing requirements. California’s HVAC Excellence certification and Florida’s mechanical contractor licensing add layers of qualification that professionals must navigate.
Extending Refrigerant Lifecycle Through Smart Maintenance
Proactive maintenance dramatically extends refrigerant life and system efficiency. Regular leak detection using electronic detectors can identify microscopic leaks before they become major issues. Modern ultrasonic leak detectors can find holes as small as 0.1 oz/year—invisible to older methods.
System cleanliness plays a crucial role in refrigerant longevity. Installing high-quality filter-driers with molecular sieves removes moisture and contaminants that would otherwise degrade refrigerant and oil. Premium filter-driers can remove particles down to 10 microns—smaller than most bacteria.
Optimal oil management directly impacts refrigerant performance. Maintaining proper oil levels and ensuring oil return to the compressor prevents refrigerant from becoming entrapped in oil, which can reduce system capacity by up to 20%.
The most overlooked maintenance practice is proper documentation. Tracking refrigerant charges, pressures, and temperatures creates a performance baseline that makes anomalies immediately apparent. Digital logging systems now allow technicians to spot efficiency declines before they become noticeable to users, often predicting failures weeks before they occur.
By avoiding common mistakes, maintaining proper certification, and implementing these maintenance practices, you’ll not only comply with regulations but also maximize system efficiency and minimize operating costs.
Learn the professional step-by-step process for safe refrigerant replacement in refrigeration systems. Covers proper handling techniques, EPA compliance, essential tools, and troubleshooting tips for optimal system performance.
Learn the professional step-by-step process for safe refrigerant replacement in refrigeration systems. Covers proper handling techniques, EPA compliance, essential tools, and troubleshooting tips for optimal system performance.